
This is a jam packed itinerary intended to showcase the best New Zealand had to offer squeezed into a three week period. The itinerary is designed for travel in a campervan so I’ve added some recommended campsites. You could easily adapt this for a car road trip but you might have to alter the route slightly to find suitable hotels en route. It’s worth noting this is a quick paced itinerary, with the plan to stay in a new location almost every night. If you have the opportunity to spend longer in New Zealand, I’d recommend stretching it out and adding in buffer days in case you find somewhere you love and want to explore more or you get rainy days that throw off plans.
We only had three weeks in New Zealand so this is the itinerary I put together. It did get disrupted due to a cancelled ferry so we actually ended up with longer in the North Island and only 1 week in the South island.
New Zealand 3 Week Road Trip Itinerary
| Day 1 | Day 2 | Day 3 | Day 4 | Day 5 | Day 6 | Day 7 |
| Arrive in New Zealand | Auckland Hahei 3.5 hrs | Coromnadel and Mt. Maunganui Mt. Maunganui 2.5 hrs | Mt. Maunganui and Hobbiton Whakamaru 2.5 hrs | Rotorua Humarana 2 hrs | Taupo National Park 1-3 hrs | Tongariro National Park National Park 0.5 hrs |
| Day 8 | Day 9 | Day 10 | Day 11 | Day 12 | Day 13 | Day 14 |
| Drive to Wellington Wellington 5 hrs | Wellington Wellington 0.5 hrs | Ferry day Abel Tasman 3 hrs | Abel Tasman National Park Abel Tasman 1 hrs | Hokitika Gorge Ross 5.5 hrs | Glaciers Wanaka 6 hrs | Roy’s Peak and Wanaka Wanaka 1 hrs |
| Day 15 | Day 16 | Day 17 | Day 18 | Day 19 | Day 20 | Day 21 |
| Queenstown Queenstown 1 hrs | Milford Sound Queenstown 7.5 hrs or bus | Arrowtown and Twizel Twizel 2.5 hrs | Mount Cook Tekapo 2 hrs | Arthurs Pass Arthur’s Pass 4 hrs | Christchurch Christchurch 2 hrs | Head home |
- New Zealand 3 Week Road Trip Itinerary
- Day 1: Arrive in New Zealand
- Day 2: Auckland and Coromandel Pennisula
- Day 3: Coromandel and Mt. Maunganui
- Day 4: Hobbiton
- Day 5: Rotorua
- Day 6: Taupo
- Day 7: Tongariro National Park
- Day 8: Drive to Wellington
- Day 9: Wellington
- Day 10: Ferry Crossing
- Day 11: Abel Tasman National Park
- Day 12: Hokitika Gorge
- Day 13: Glaciers
- Day 14: Roy’s Peak and Wanaka
- Day 15: Queenstown
- Day 16: Milford Sound
- Day 17: Arrowtown & Twizel
- Day 18: Mount Cook and Lake Tekapo
- Day 19: Arthur’s Pass
- Day 20: Christchurch
- Day 21: Head home
Day 1: Arrive in New Zealand
Fly into Auckland to start this itinerary. Collect your campervan or hire car – I would recommend a campervan, I’ve included suggestions for campsites here but a car and hotels can also work. Click here to read more info about hiring a campervan if you’re not sure where to start looking!
If you have much time on your first day, head into Auckland to explore the city!
Day 2: Auckland and Coromandel Pennisula
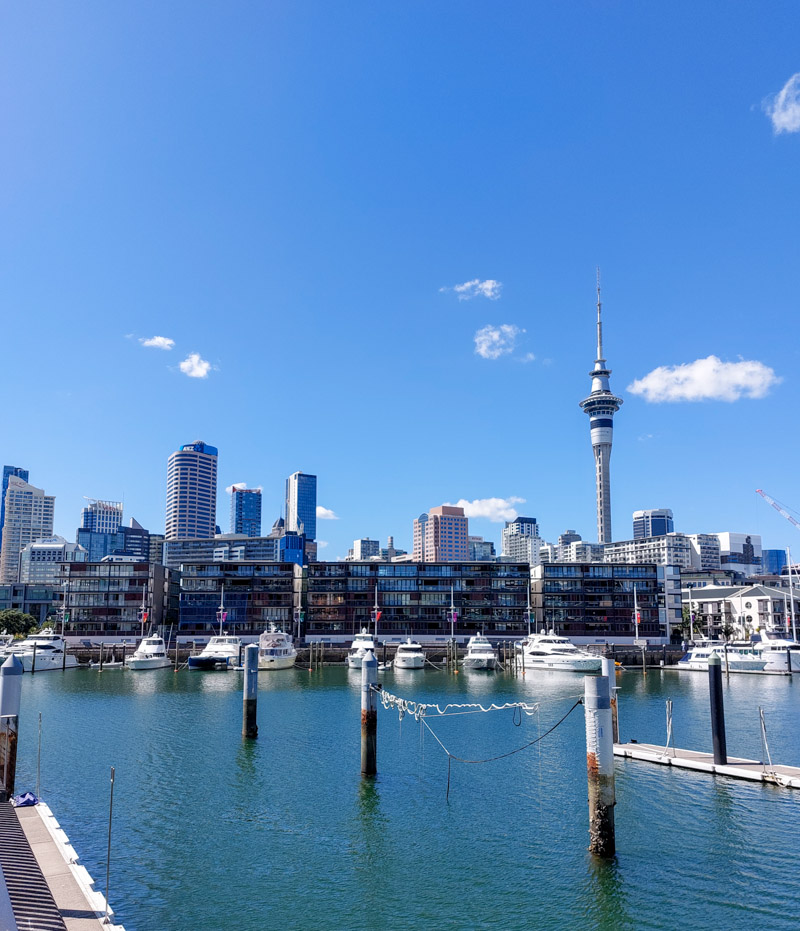
Lots of campervan companies have depots in Auckland, plus the airport receives lots of international flights so it is a great place to start your adventure. Collect your campervan and head into the city for a brief exploration. I say brief because whilst Auckland is a decent city, the cities are not what you go to New Zealand for. The real spectacle is out in the countryside, up the mountains and along the coast! Whilst you’re in Auckland, I’d recommend going for a stroll along the harbour. Maybe grab some lunch and stock up on snacks.
Next drive around to the Coromandel Peninsula to see some of the New Zealand’s Coast. Currently this drive will take around 3.5 hours as a more direct road is closed. If the route is open and you can drive via Kopu, it will be much quicker. Otherwise, you will have to go the long way around, but this means you can stop off at Owharoa Falls. If you have time before dark, visit Cathedral Cove, if not save it for the morning and set up camp for the night!
Campsites: Hahei Holiday Resort ($39+)
Driving: 3.5 hours, 234km
Activity Costs: free
Day 3: Coromandel and Mt. Maunganui
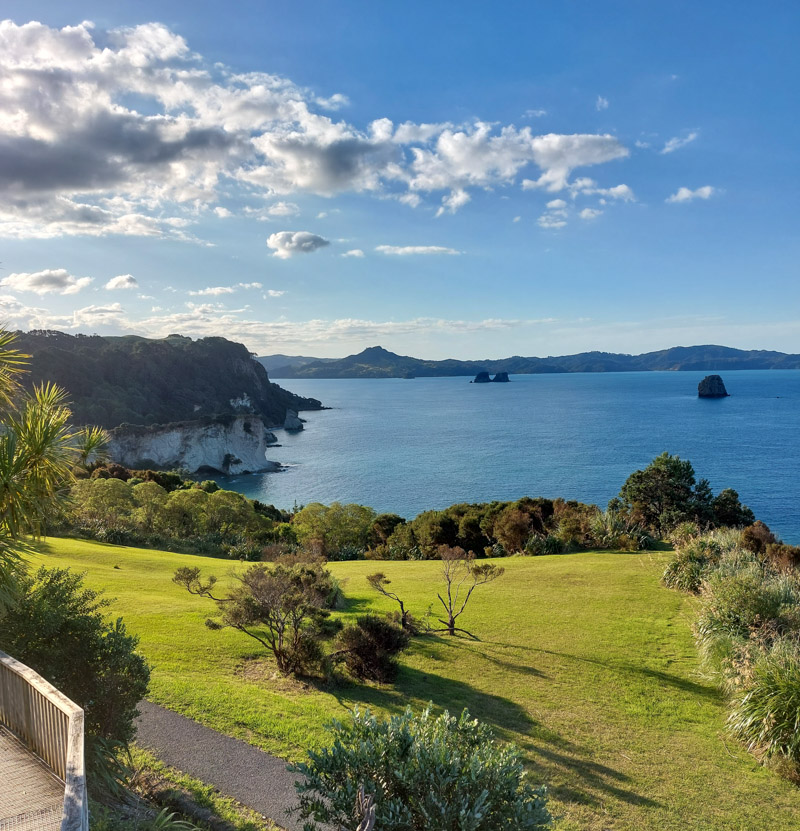
If you didn’t have a chance the previous day, visit Cathedral Cove. You can’t drive all the way up to the viewpoint so park up in town and walk up, or take the park and ride from Hahei.
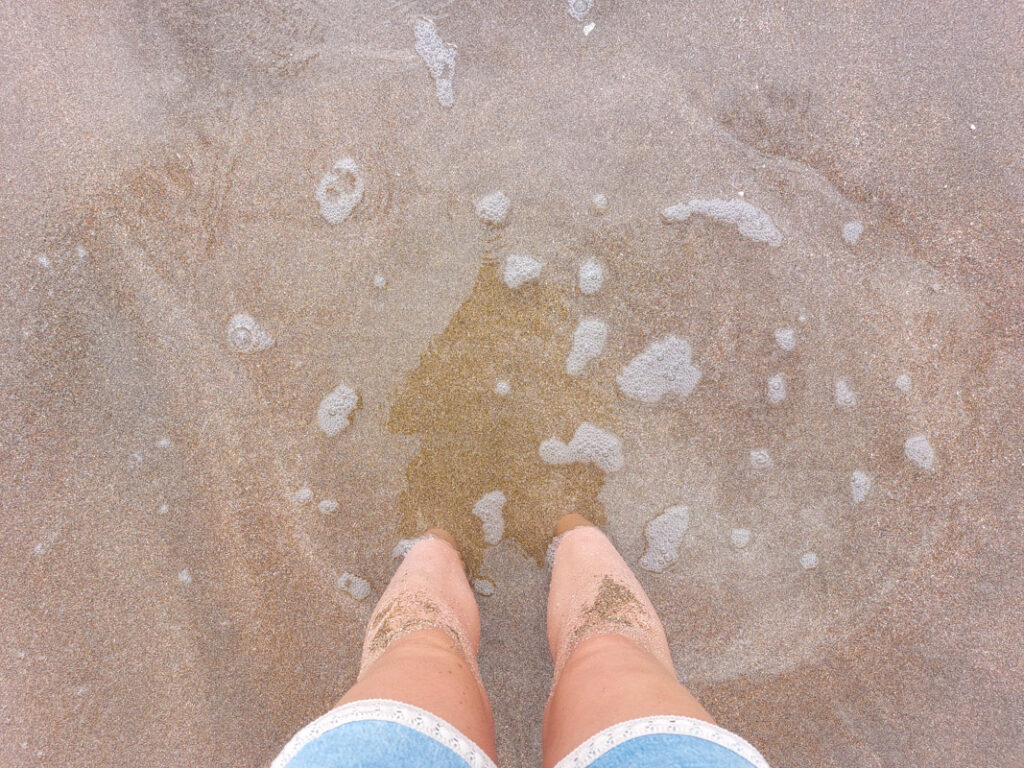
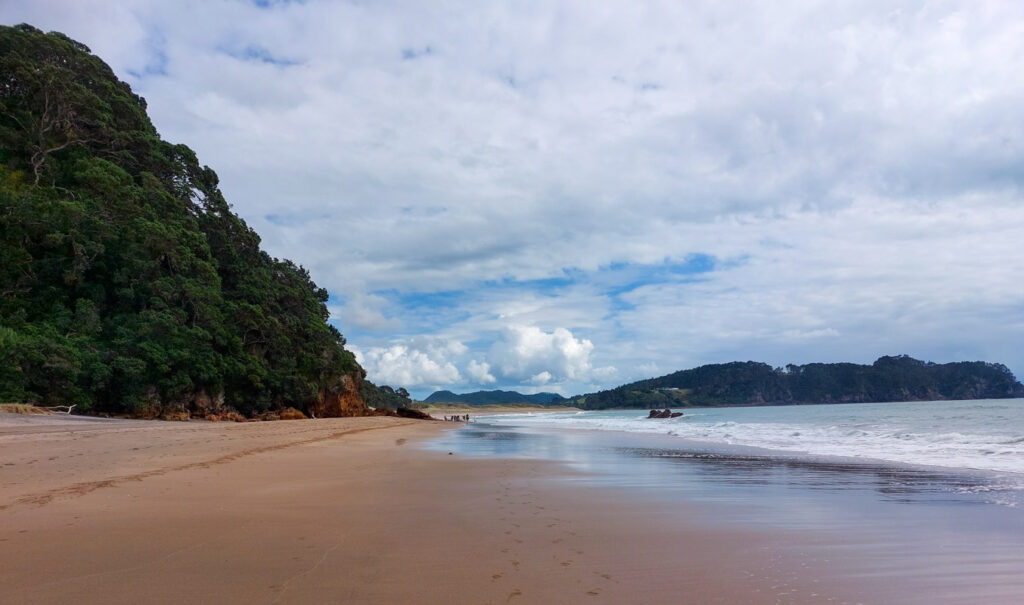
Next, head to Hot Water Beach – just 10 minutes down the coast. This isn’t quite what it sounds, the sea itself isn’t hot here but if you dig down in certain spots you will reach hot water thanks to geothermal activity. It can be tricky to find the right spot. We basically relied on watching other people who seemed to know what they were doing and digging near them. I also took to watching the waves crash and recede and looking for little bubbles on the wet sand. This indicates a hot spot as the water was boiling. Whilst George struggled to dig a pit, I just let my feet sink into the hot spots I found along the shore. You can rent a shovel at a hut by the car park.
The next stop of the day is Mount Mangaunui, a small coastal town, next to the larger city of Tauranga. This will take around 2.5 hours to drive to. If you didn’t visit Owharoa Falls the previous day, you can take a short detour to it during this drive.
If you enjoy cricket, Mt. Maunganui has a great cricket ground with a long grass bank for spectators. Take a look and see if there is a match on, especially if it’s a nice sunny day! We managed to catch an England vs. New Zealand on a lovely sunny afternoon.
Campsites: Cosy Corner Holiday Park ($60) or Whareroa Reserve (free, SC only)
Driving: 2.5 hours, 162km
Activity Costs: free, unless you attend a cricket game (prices vary)
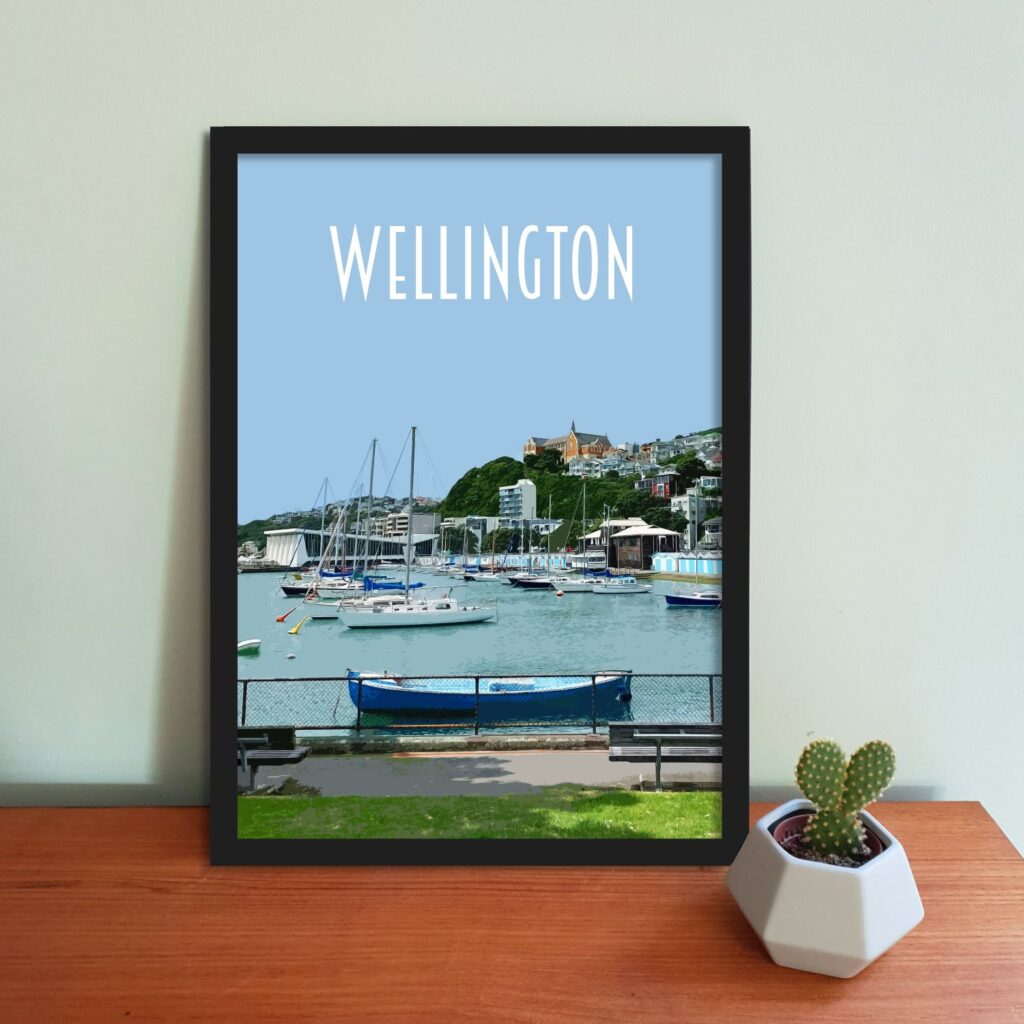
North Island Travel Posters
Day 4: Hobbiton
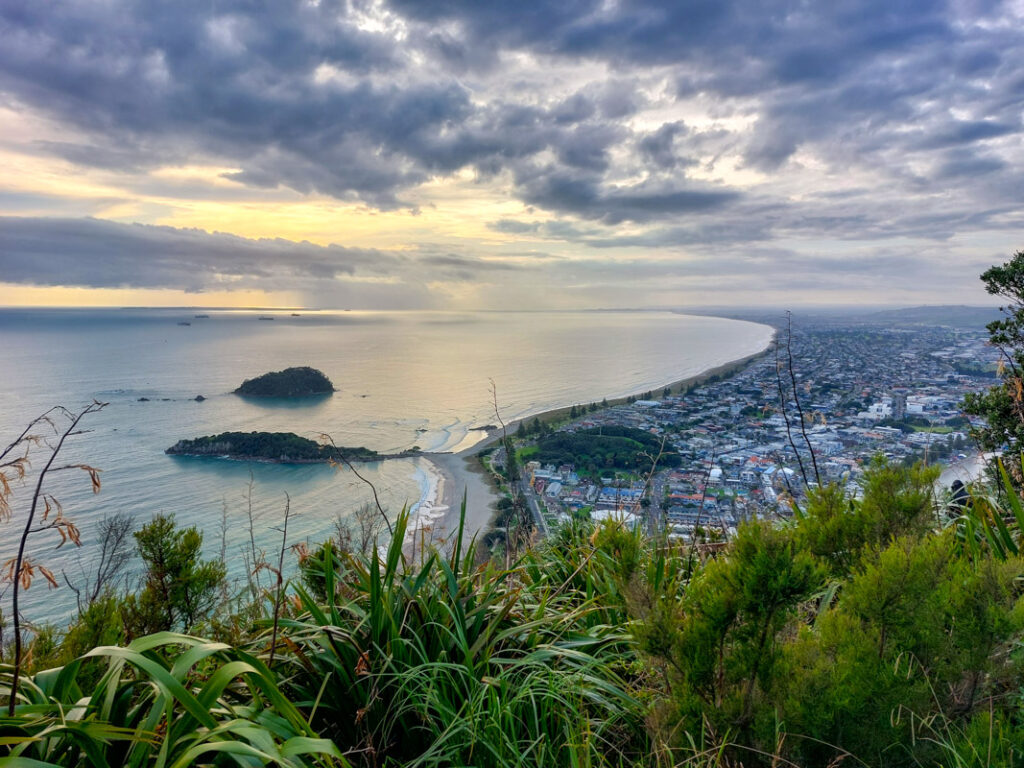
Get an early start to hike up the actual mount of Mount Maunganui. Parking is limited near the mountain, especially on weekends so if your campsite is in walking distance, leave your car there and walk. The climb is fairly tricky although there were a lot of people jogging up and down so I suppose its all subjective. If you’re there in the summer, definitely start before it gets too hot. There are a few trails to choose from, depending on how much of a climb and walk you’re feeling up to. From the peak you can enjoy a lovely view over the coast.
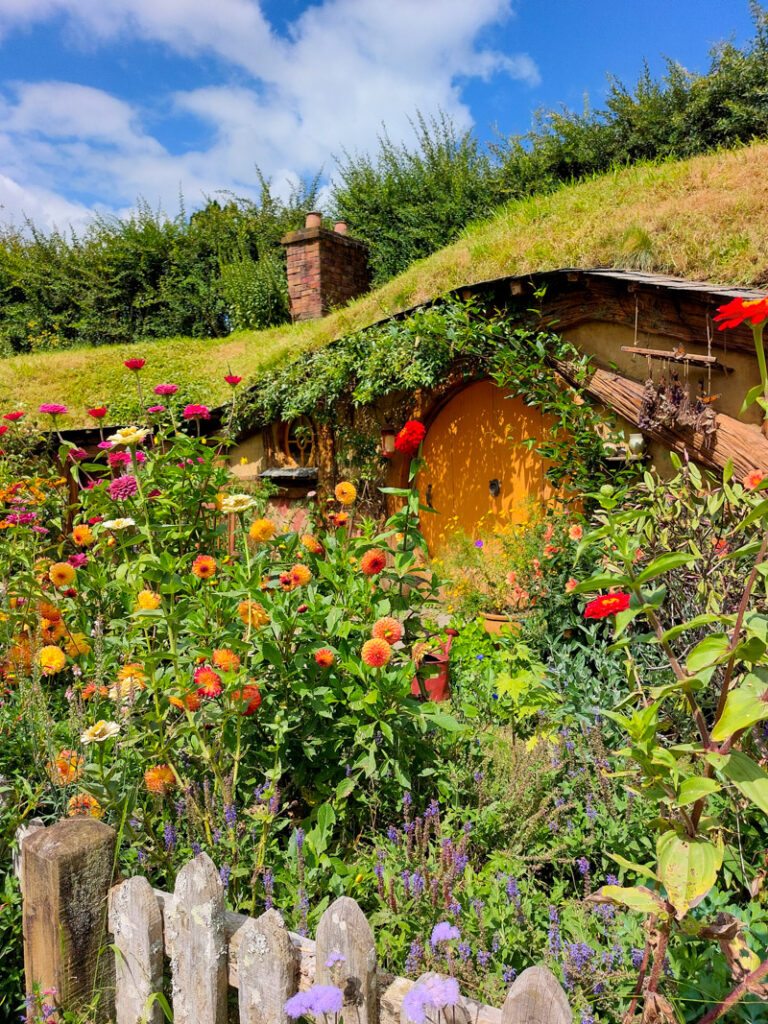
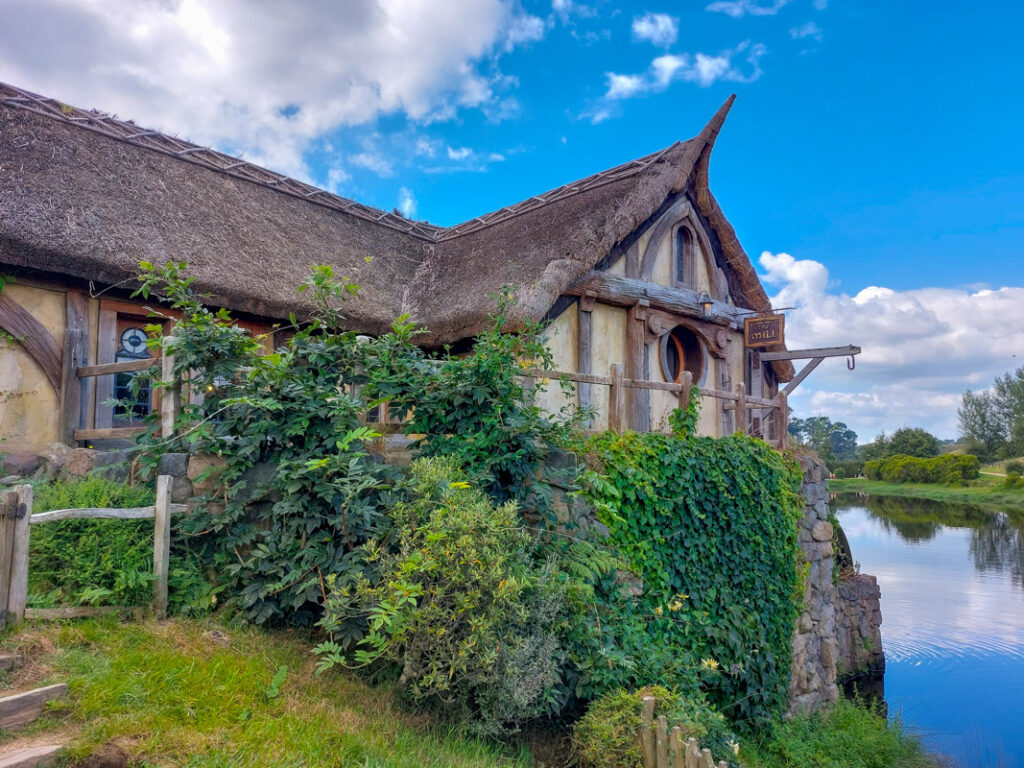
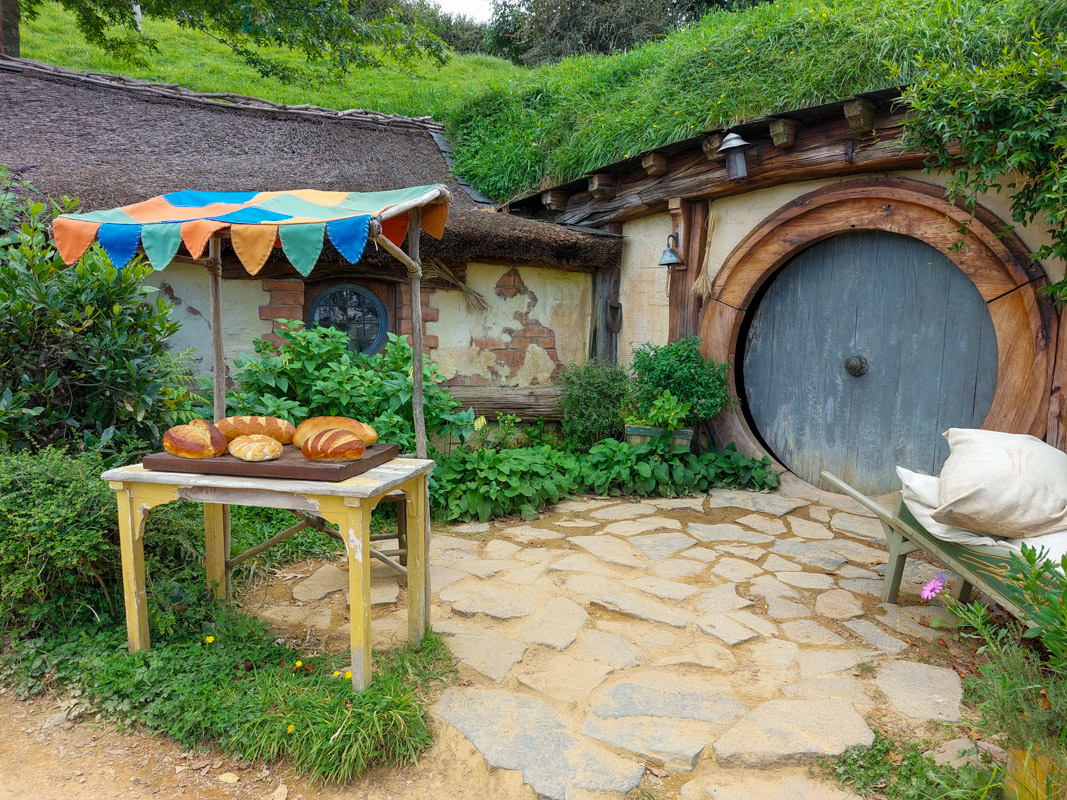
In the afternoon, take a trip to Hobbiton! If it is your first time visiting New Zealand’s North Island, a trip to Hobbiton is a must! It is easy to see why this location of rolling green hills was selecting as the backdrop for ‘The Shire’ in the Lord of the Rings films. Whilst the original set was dismantled after the last Lord of the Rings film, the entire village was rebuilt for the Hobbit and this time kept alive to become the Hobbiton Tourist Attraction. To take a guided tour of the set, you must book in advance online as time slots are limited.
After the tour you can relax with a free beer or cider in the Green Dragon Inn! If you really want to make the experience special, you can upgrade to banquet options from $199 NZD.
Campsites: Whakamaru Recreation Area (free)
Driving: 2.5 hours, 162km
Activity Costs: from $89
Day 5: Rotorua
On the way to Rotorua, stop off at Okere Falls for a short walk. Okere consists of two waterfalls, Tutea and Trout Pool Falls, and a cave. You can also go white water rafting there too.
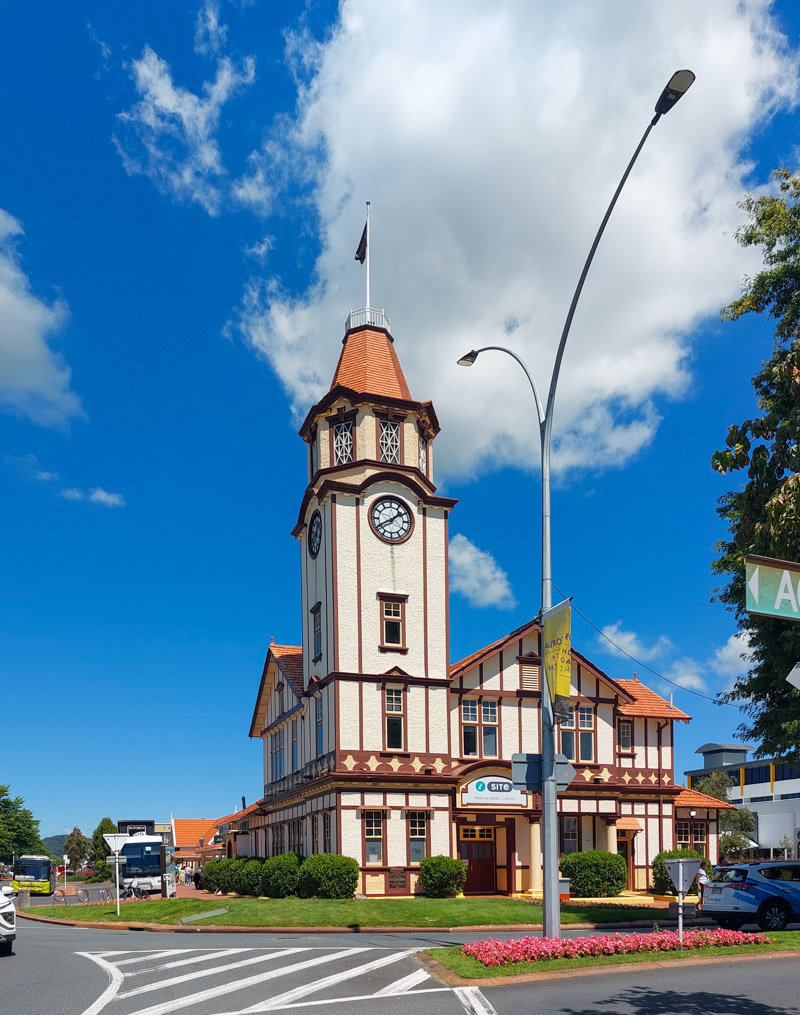
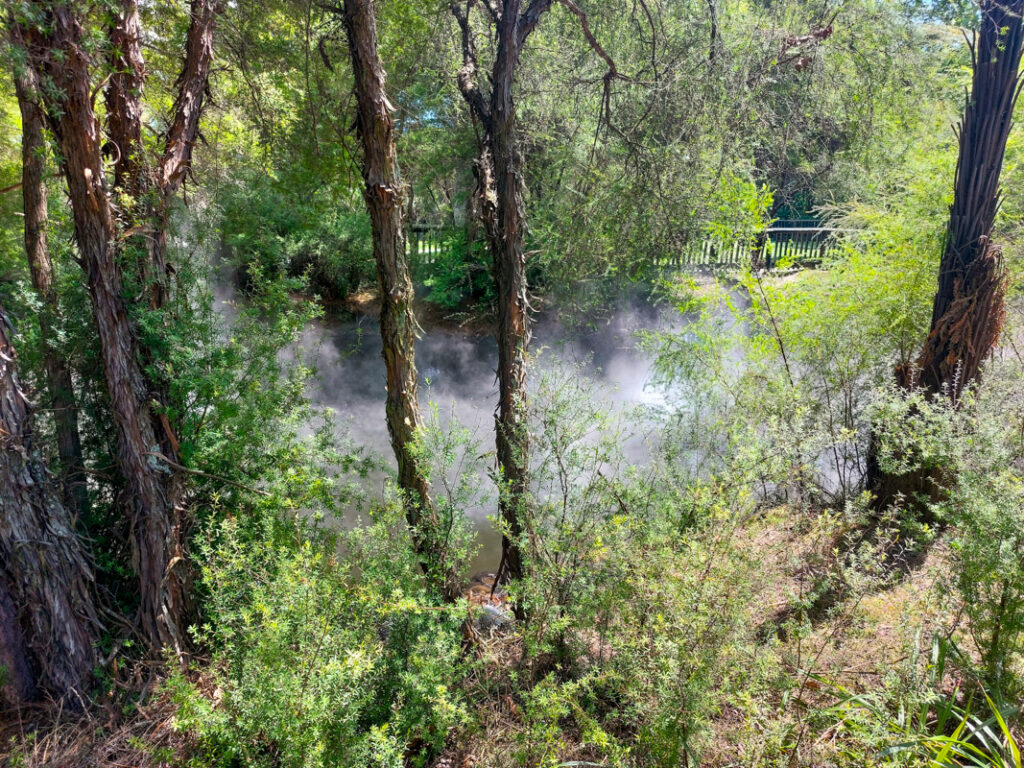
Drive into Rotorua for a wander around and bite to eat. The tourist information office is housed under a tall clock tower. The staff there are lovely and very helpful! If you don’t get a chance to visit, you can read more about things to do in Rotorua here. Whilst in town, I’d recommend stopping by Kuaira Park. This is a free park with bubbly mud pools and steamy ponds. There is also a geothermally heated pool that you can dip your feet into.
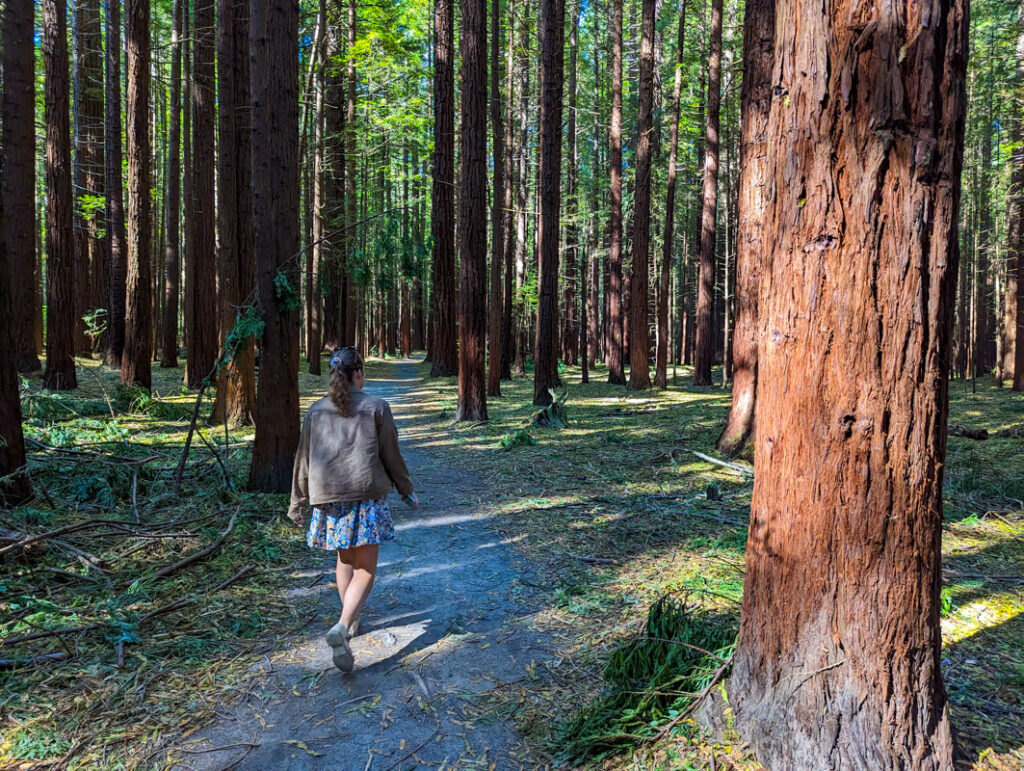
Go for a stroll among the giant trees at Redwoods Park. There are several free walking trails on the ground or you can pay to walk amongst the tree on a tree-top trail. This consists of bridges strung from trunk to trunk and costs $37. The free trails range from 30 minutes to 3.5 hours so plenty to keep you occupied. We opted for the one in the middle of the range which led us through the forest, a swampy hot spring and an old quarry – not that it looked like a quarry at all!
After the walk, head to Whakarewarewa Living Maori Village for a tour around the Maori settlement and a walk around the geothermal park. Entrance here isn’t cheap ($40 NZD) so if you would prefer to safe money and see some geothermal activity for free, stick with Kuaira Park in Rotorua. Whilst you will lose the Maori experience visiting here instead, it is still a great experience to have for free!
Park up for the night at Humarana Reserve campsite. This was one of our favourite campsites and its free for all campervans! The campsite overlooks the lake and has a spring nearby. There are also toilets and a water tap.
Campsites: Humarana Reserve (free)
Driving: 2 hours, 128km
Activity Costs: $0-$77
Day 6: Taupo
The road from Rotoura to Taupo is only 80km — but is filled with attractions. Set out early to make the most of the day!
Stop 1: Rainbow Mountain and Crater Lake.
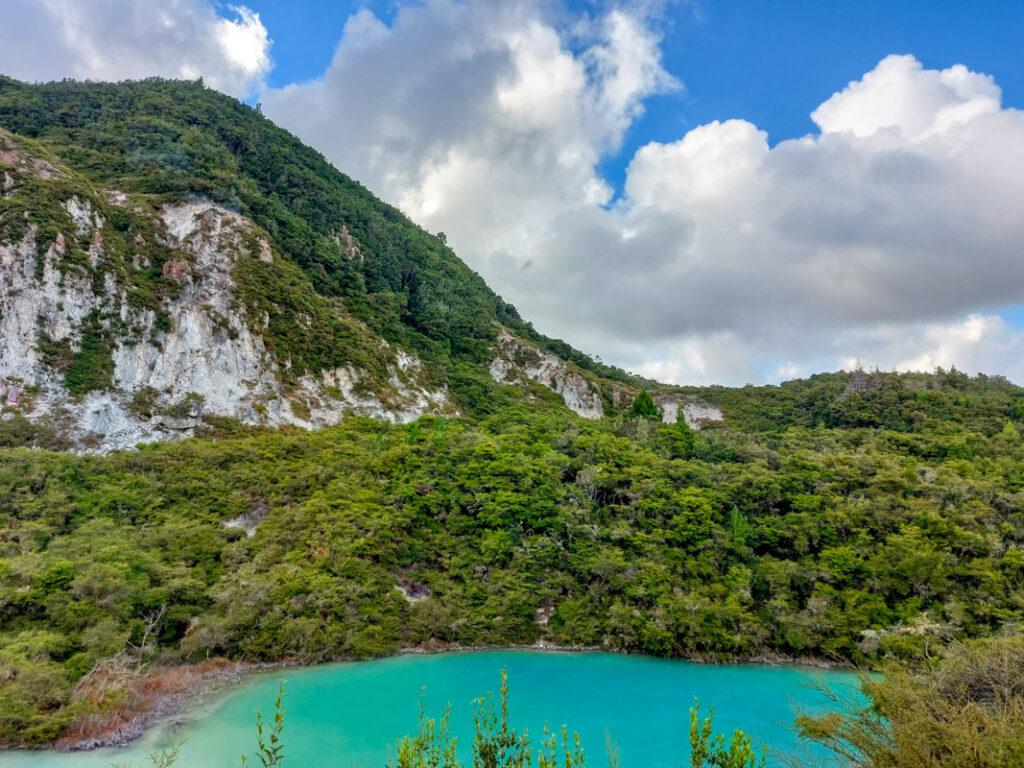
There are a few trails you can hike here, the shortest being just 15 minutes to Crater Lake. The lake is a sparkling turquoise colour set against the backdrop of the striped mountain. You may need to lower you expectations here, it isn’t exactly rainbow coloured, more green, white and rust coloured – it still makes for a nice, short walk though!
Stop 2: Kerosene Creek
Next stop is Kerosene Creek, a naturally heated steam surrounded by trees and ferns. Sit by the gentle waterfall for a natural hotub experience! By the creek there is one toilet that is also used as a changing area but no other facilities so it feels very natural and rustic. Although the creek can get busy at times there is plenty of space to find a somewhat private spot to lounge in the warm waters.
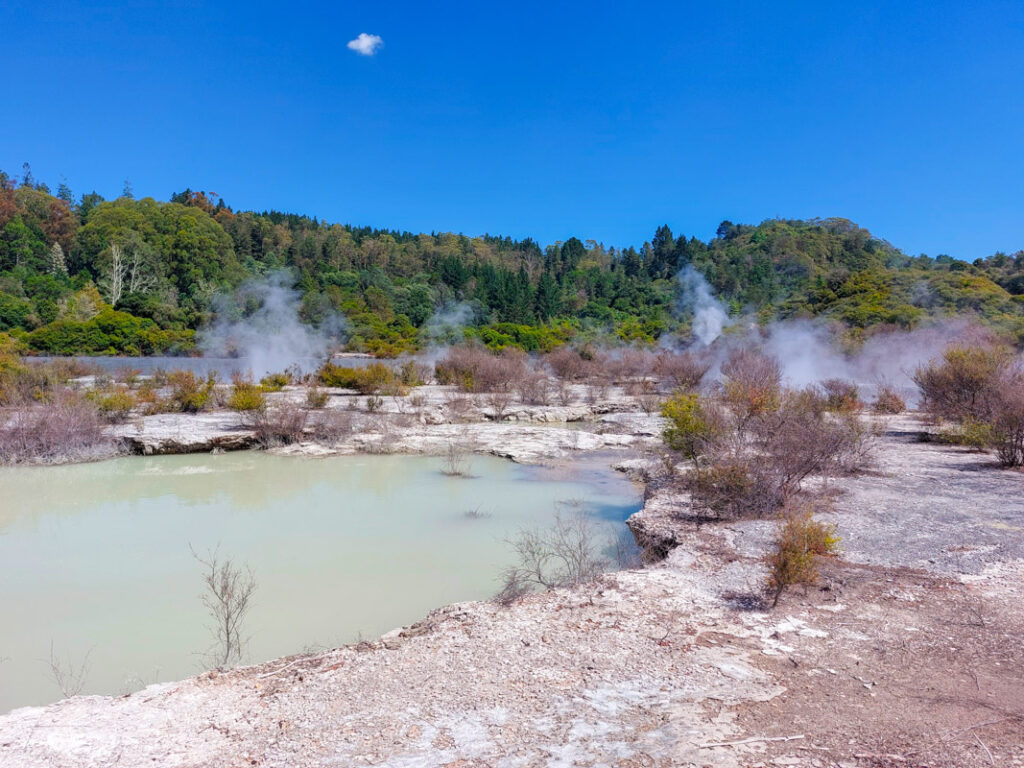
Stop 3: Wai-O-Tapu Thermal Wonderland
This is another geothermal park. This one has a geysir and waterfall. Again entry isn’t cheap ($32.50 NZD) so if you want to save money or feel you’ve seen enough geothermal activity, you could skip this and spend longer at Kerosene Creek.
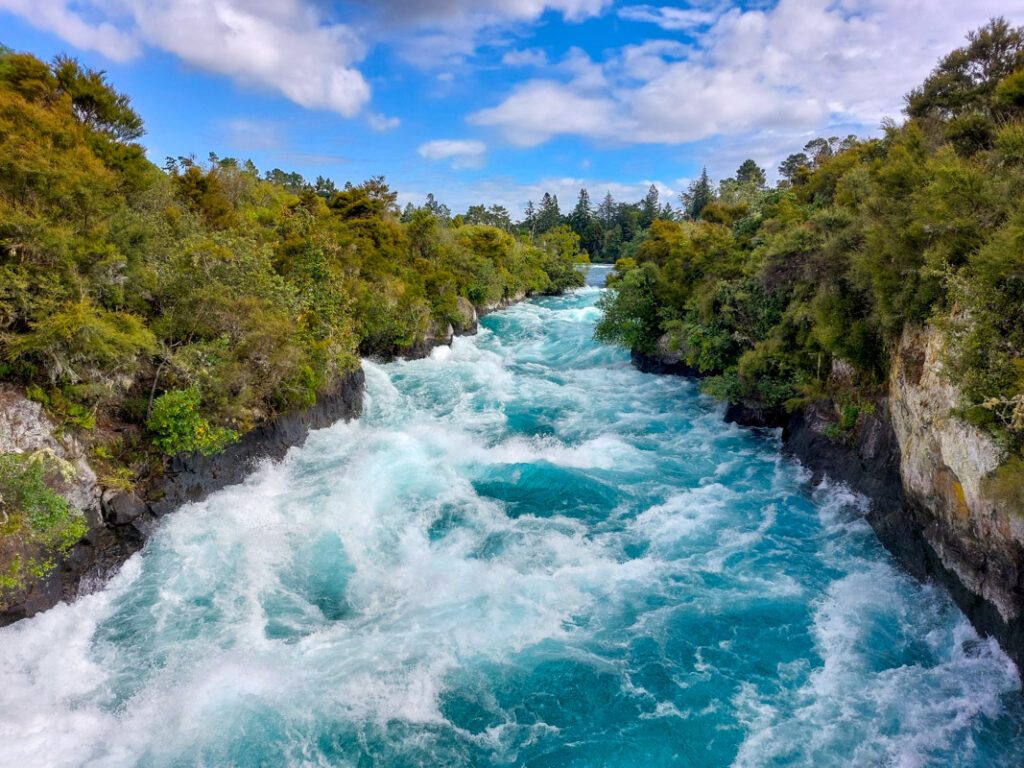
Stop 4: Aratiatia Rapids
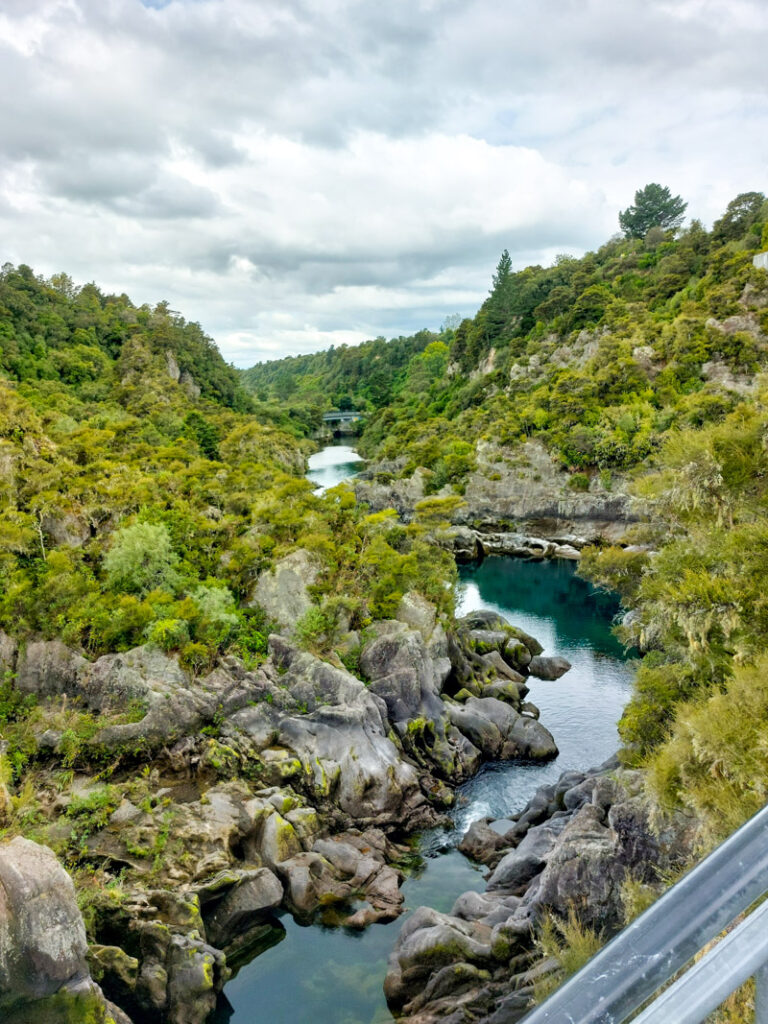
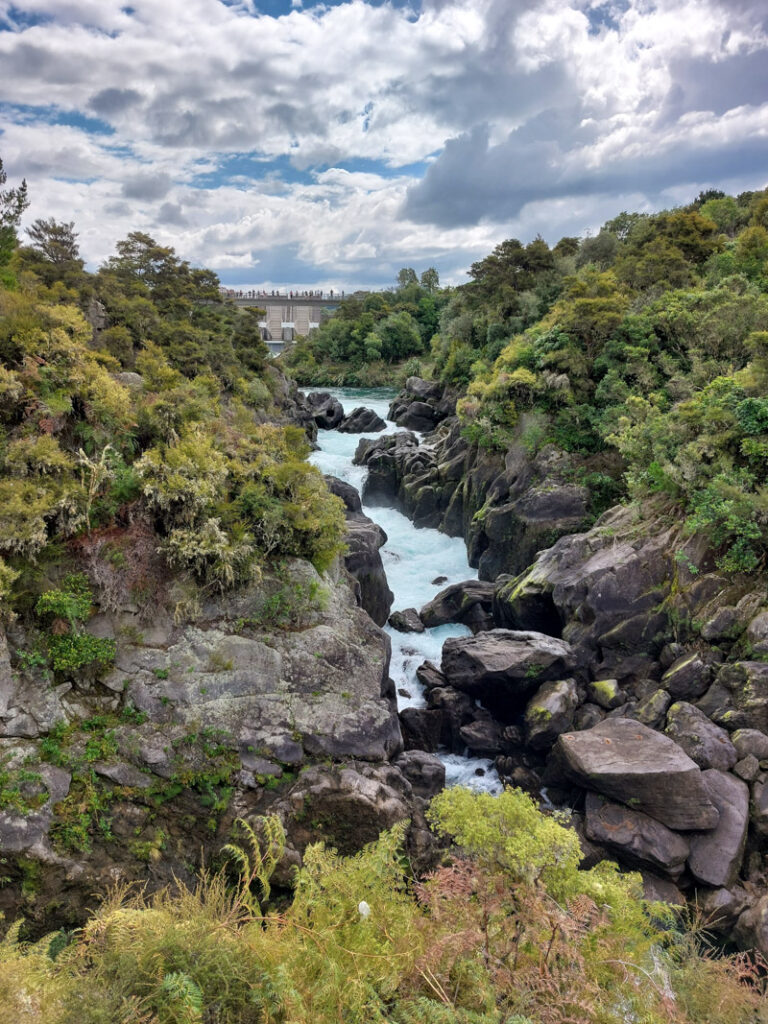

Just outside of Taupo, you’ll find the unique Aratiatia Rapids. This is the more time-sensitive attraction of the day. Water is released into the rapids at 10am, 12pm and 2pm everyday (and 4pm in the summer). The water gushes into the cascading rocks and fills the rapids over the course of 15 minutes. It is an incredibly unique site to see. Hobbit fans may also recognise this as the location of the barrel scene where the dwarves tumbled down a waterfall. The filmmakers filmed empty barrels floating down the rapids and added the actors in using CGI. Make sure you get to the rapids around 15 minutes before the water-release time as the viewpoints are a short walk away.
Stop 5: Haku Falls
The final spot before reaching Taupo is Haku Falls, further along the same river. After walking around the falls, head into Taupo for a quick look around and maybe a bite to eat.
You could camp near Taupo, or if you feel able to drive a little further, head down to National Park. Confusingly this is the name of a tiny village next to Tongariro National Park. There are two main campsites there. One is a cold carpark where you pay for entry, showers and other facilities via a machine (from $10 per night). The other is a cosy campsite/motel/shop run by a friendly woman called Joy. Joy’s also had a huge kitchen we could use and a living room with a wood burning fire ($20 pp, all facilities included).
Campsites: Joy’s, National Park ($20 pp)
Driving: 1-3 hours
Activity Costs: $0-$32.50
Day 7: Tongariro National Park
Possibly one of the most famous National Parks on the North Island, Tongariro is most known for the Tongaririo Crossing. This is a 6-8 hour hike across the mountains. The weather is known to vary and change quickly throughout the walk so prepare for as much as you can!
I was on the fence about doing the hike to begin with because I’m not the most athletic person, I didn’t have hiking boots with me and to be honest walking for that long isn’t for me. When we woke up to rain and threatening grey skies, that settle the decision for me. Instead of doing the Tongariro Crossing, we still got out our raincoats and visited the national park but just did smaller, shorter walks instead. That way we could retreat back to the campervan when the rain got too heavy.
Campsites: Joy’s ($20 pp)
Driving: 25 minutes, 30km
Activity Costs: $0
Day 8: Drive to Wellington
If you fancy it, you could squeeze in another hike in Tongariro National Park before leaving. This day involves quite a lot of driving so you might want to stretch your legs.
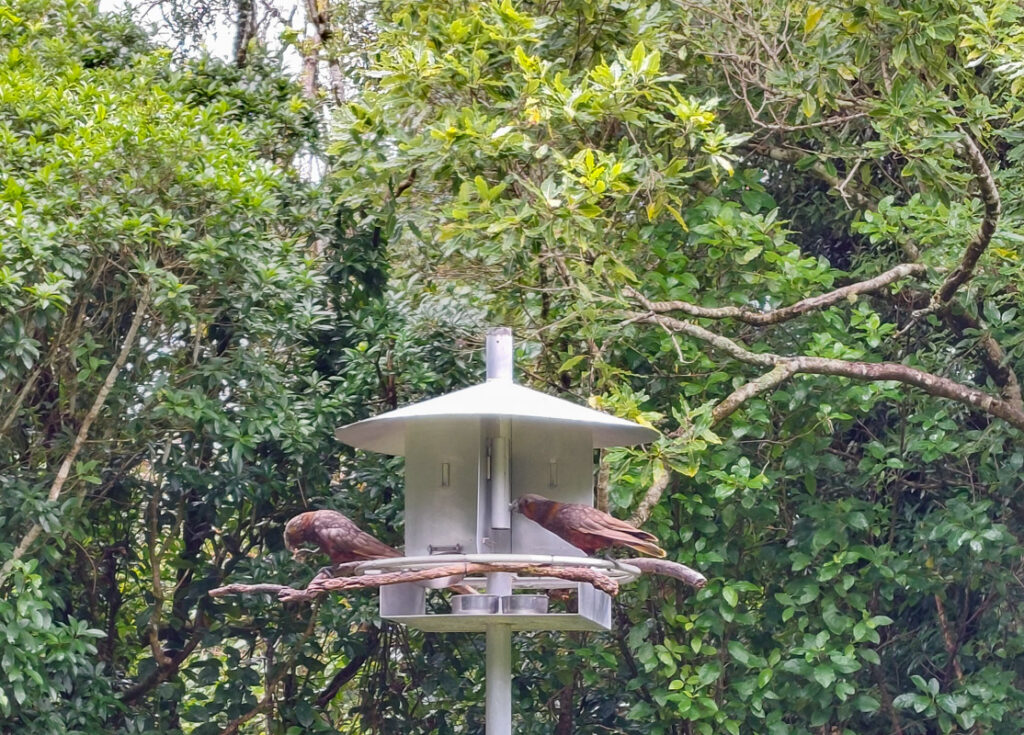
To break up the drive between Tongariro and Wellington stop at the Pukaha National Wildlife Reserve. This is a sanctuary for native birds, many of which are threatened or endangered. The centre works on lots of conservation projects, including captive breeding programmes. Here may be your only chance to see New Zealand’s native Kiwi birds. The birds are endangered and nocturnal so incredibly difficult to spot in the wild!
The Nature Reserve is around a 3 hour drive from Tongariro and from there it’s another 2 hours to Wellington.
Campsites: Top 10 Wellington ($55) – cheaper/free alternatives are available for self-contained vehicles closer to Wellington.
Driving: 5 hours, 346km
Activity Costs: $24
Day 9: Wellington
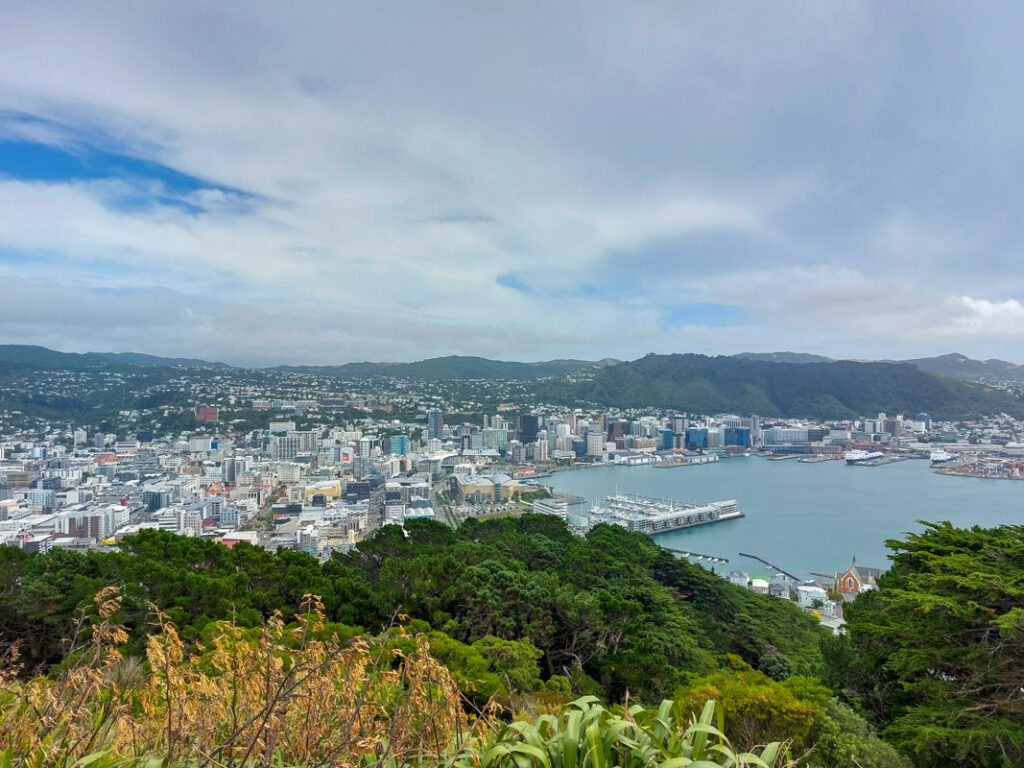
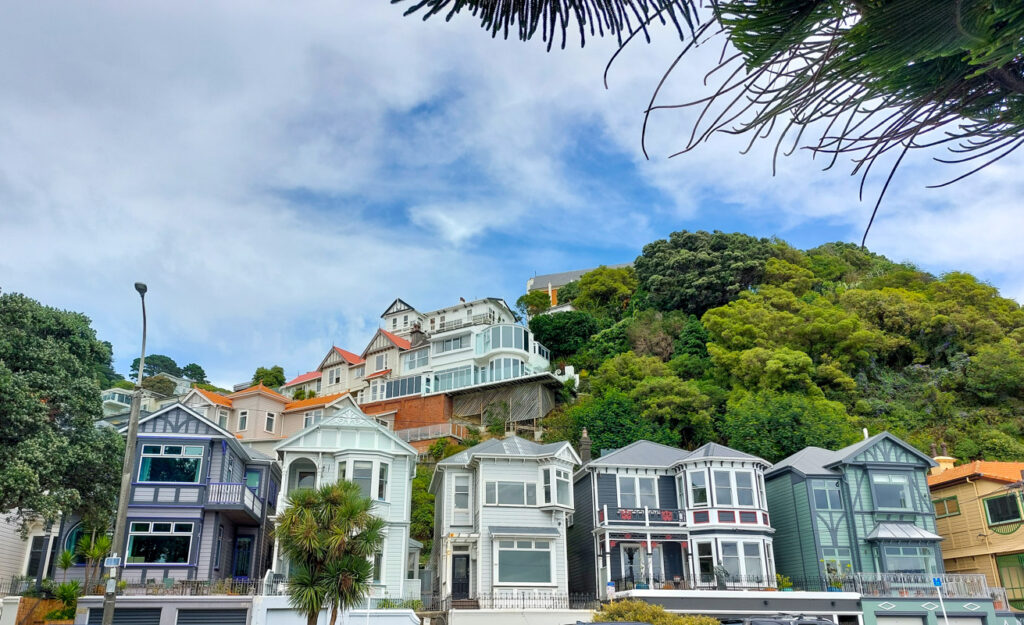
To start your day in Wellington, I’d recommend a stroll up Mount Victoria. From the top you can get a glorious view over the city and the bay. Enter the park from Lawson Place and walk up to the viewpoint from there. Instead of leaving the way you came in, head down towards Freyberg Beach via Moeller Street for a different view of the city along the coast.
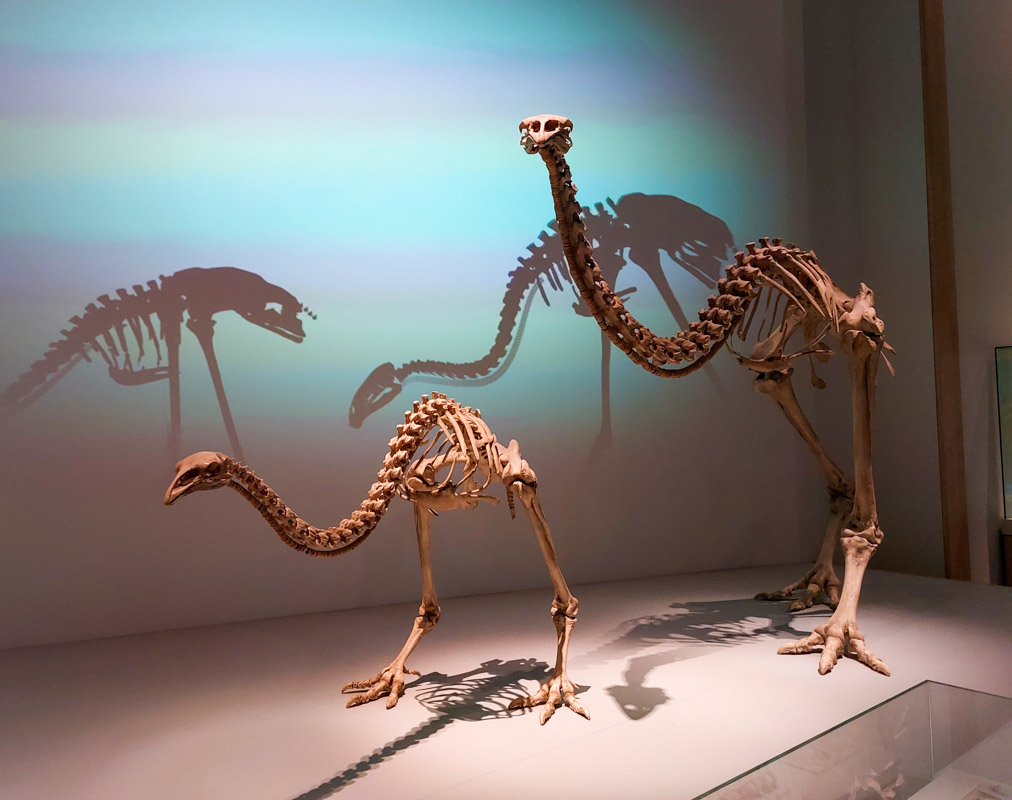
If you continue along the coast, you will reach the Museum of New Zealand. This is a huge modern building houses a vast array of fascinating exhibits. The galleries cover a range of topics, you could easily spend a full day there explore modern art, local history and nature and science exhibits. During our visit there was a fascinating section on Gallipoli campaign during WWI – something I knew nothing about before but I would highly recommend visiting! Click here to browse the current and upcoming exhibits. As an added bonus – the museum is free to enter!
Further along the coast, you’ll find a smaller museum – the Wellington Museum. This museum shares stories of Wellington’s history. It’s not quite as spectacular as the Museum of New Zealand so if you only have time for one museum, I would go for the former.
Further inland, take a stroll along Cuba Street – one of the city’s most vibrant shopping areas.
This evening or early next morning take the ferry across to the South Island. Make sure you book this weeks, if not months in advance!
Day 10: Ferry Crossing
Take the ferry across from Wellington to Picton, in the South Island. It shouldn’t take all day but I’m adding this day as a bit of a buffer day. Depending on what time your ferry is, you could spend longer in Wellington or head to the South Island as early as you can.
Once you reach the south Island, head towards Abel Tasman National Park.
Day 11: Abel Tasman National Park
Spend the day exploring Abel Tasman National Park. The coastal park in the north of the South Island features lots of interesting land formations, such as the famous Split Apple Rock, Cleopatra’s Pool and Labyrinth Rocks.
There is plenty to squeeze into one day in this part of the island. There is even another national park, just next door – Kahurangi National Park.
Campsites: Alexander Bluff Road Reserve (free) or Kina Beach Reserve ($10 pp)
Driving: variable
Activity Costs: $0
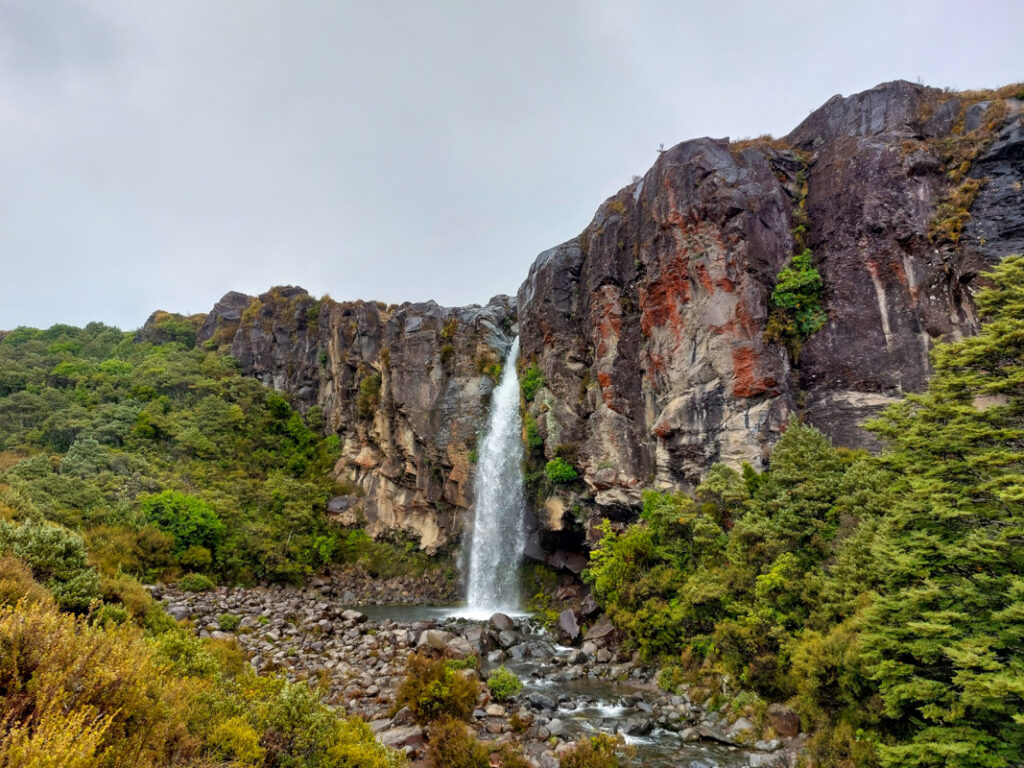
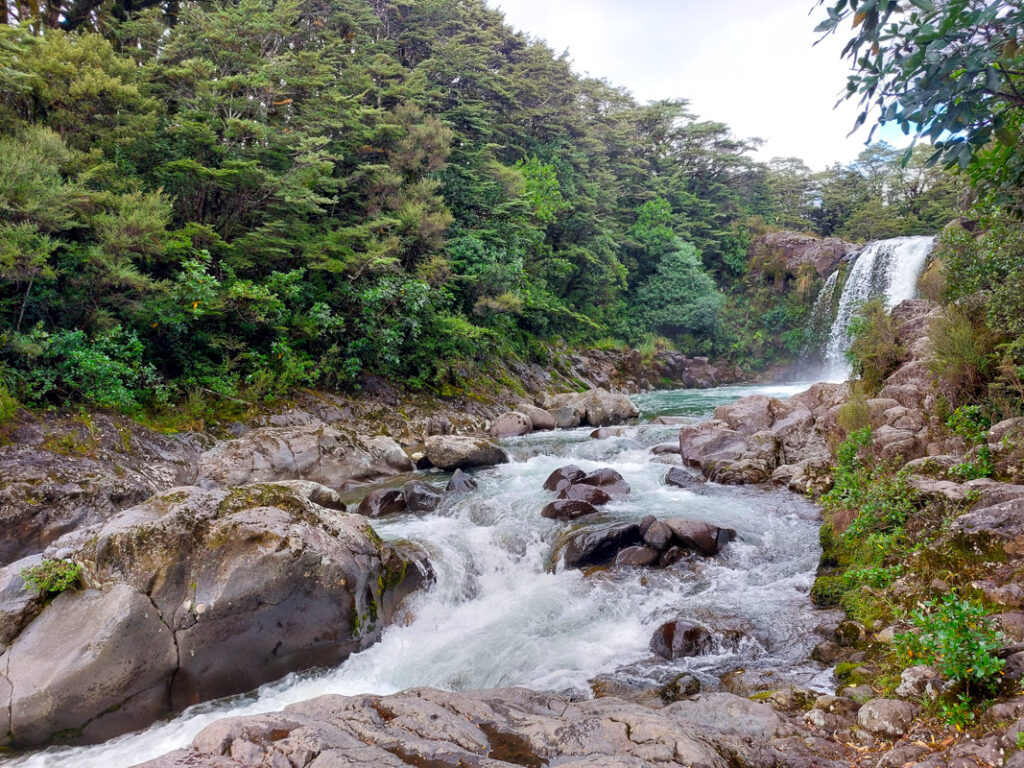
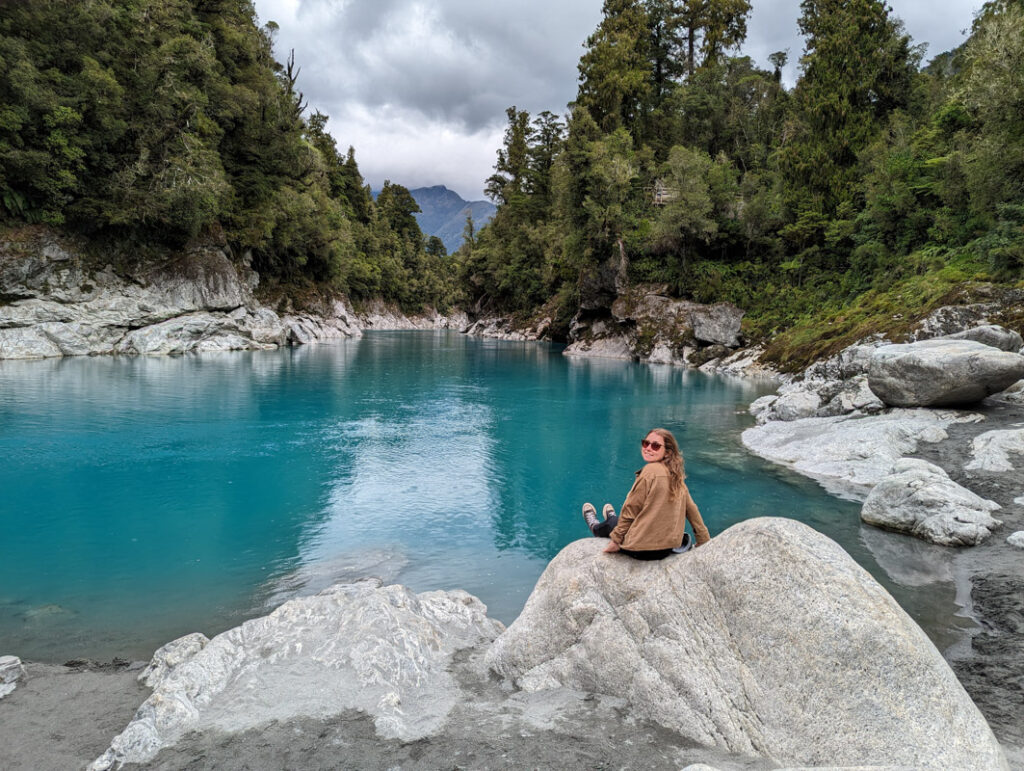
Day 12: Hokitika Gorge
As you drive down the coast towards Hokitika, you will pass the town of Greymouth. This is a great place to stop and get supplies if you need any as there is a large The Warehouse and a Countdown supermarket.
Hokitika Gorge, our main stop of the day, is truly gorgeous, especially if you visit on a clear, sunny day. The Gorge is filled with bright, turquoise water. There is a trail around the gorge with a few bridges running across it.
For the evening, I recommend staying in the small village of Ross. The Historic Empire Hotel is a pub/motel there that offers cheap parking for campervans with access to showers, toilets and a kitchen. Plus you’re right next to a characterful pub too! This was our first experience of New Zealand’s drink measures of jugs and handles instead of pints!
Top tip: Whilst camping in small villages in the South Island, you may occasionally hear a loud wailing siren sound. We were woken up by this in Ross and were very confused. At first I thought it sounded like a WWII air raid siren, then I thought, does this mean there is a tsunami coming? After a peak out of our window to check if anyone else was panicking (they weren’t) and a quick google and ask around, we realised it was a call for emergency services. In small towns in New Zealand these sirens are commonly used to alert the local emergency services to an emergency – like a town-wide fire alarm!
Campsites: The Historic Empire Hotel ($10 pp)
Driving: 5 hr 20 mins, 400km
Activity Costs: $0
Day 13: Glaciers
This day has a fair bit of driving but lots of exciting places to stop as well! The first stop is around 1 hour 20 minutes away from Ross.
Stop 1: Okarito Lagoon
A vast lagoon by a former gold mining town. There is a small rustic hut sitting over the lake which has some free information boards explaining the history of the almost deserted town. From the Lagoon its around a 30 minute drive to the first Glacier of the day.
Stop 2: Franz Josef Glacier
The view point is now very far away from the glacier (2km!) but you can still just about see it. Its incredible to think that just over 100 years ago the glacier extended as far as the current viewpoint. There are a few walking trails you can do around the view point. After the glacier, drive another 30 minutes to Lake Matheson.
Stop 3: Lake Matheson
Lake Matheson is also known as Reflection Lake. You really need a clear day to see where it gets its name as the calm, still water perfectly reflects the surroundings. There was patchy light rain and clouds when we visited but we still enjoyed a lovely walk around the perimeter of the lake. You can also enjoy a quick pitstop in the gift shop and cafe after your walk. The Lake is then just a stones-throw away from the viewpoint for the second glacier of the day – just a 5-10 minute drive.
Stop 4: Fox Glacier
Another glacier with a distant view point! If you want to get closer to the glaciers, you can book a helicopter flight to see them in all their glory! After this viewpoint, there is a fairly long but scenic drive ahead, the next attractions are a 2 hour 15 minute drive away.
Stop 5: Thunder Creek Falls and Fantail Falls
As you follow the road towards Wanaka, you will be lead into a forest with several points to stop along the way. I’d recommend stopping at Thunder Creek Falls and Fantail Falls, both are very short walks from the roadside so can be very quick stops. Or you can rest at either for longer if you have the time as they are peaceful, secluded spots.
Continue driving towards Wanaka, this should just be one more hour. The road will eventually come out of the woods and run alongside Lake Wanaka and Lake Huwea. There are a few parking bays along this scenic stretch of road where you could pull in and enjoy your dinner with a view. Sadly you cannot camp along the road, but Red Bridge Reserve campsite is free for self-contained vehicles and not too far away. For non-self contained vehicles try Camp Lake Hawea ($15pp) or Luggate Albion Cricket Club ($10pp).
Campsites: Red Bridge Reserve (free, SC only), Camp Lake Hawea ($15pp)
Driving: 6 hours, 439km
Activity Costs: $0
Day 14: Roy’s Peak and Wanaka
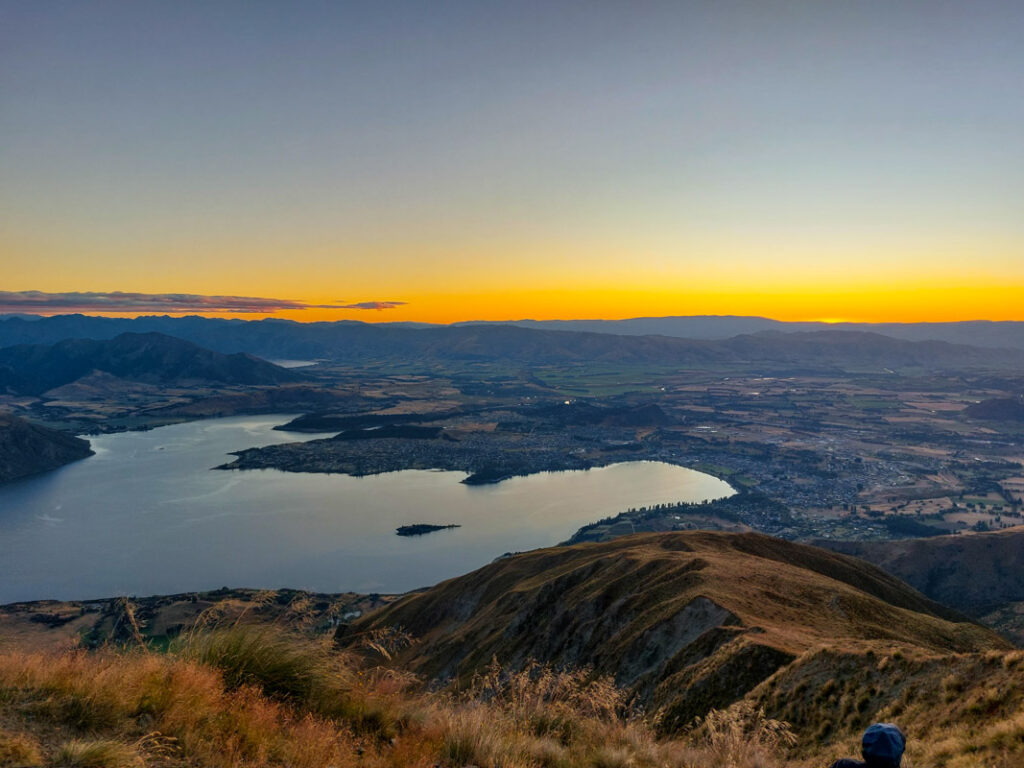
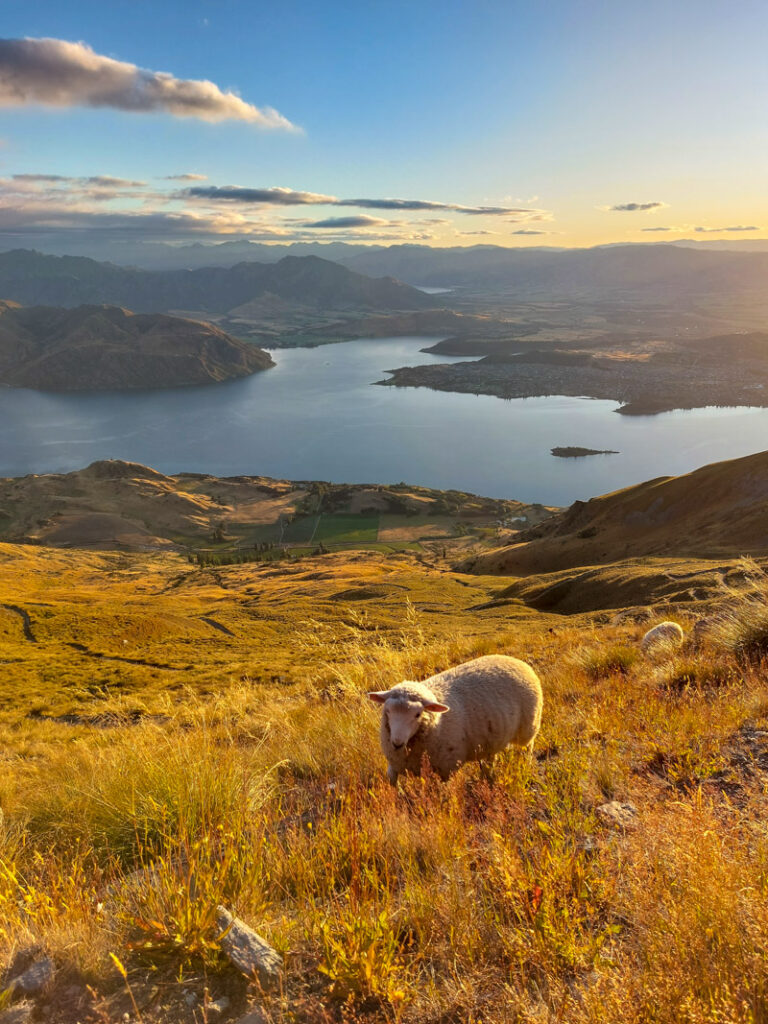
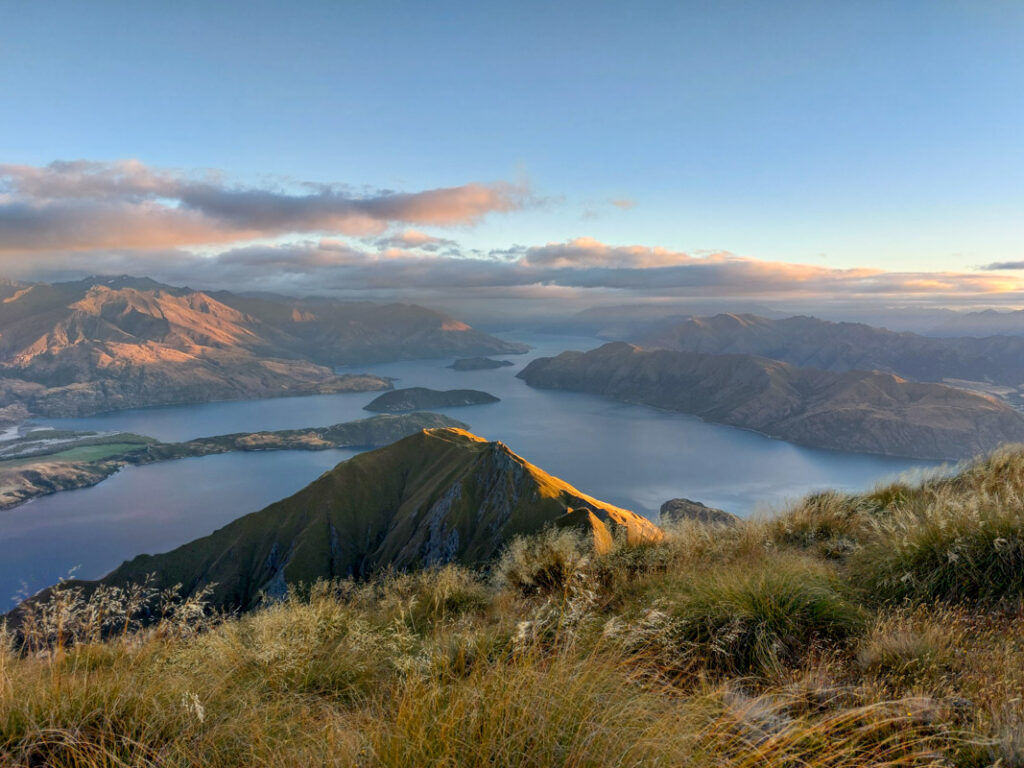
Roy’s Peak is a well known mountain trail just outside of Wanaka. The views over the lake and neighbouring mountains are absolutely stunning. I would recommend starting early for this hike so that you reach the peak in time for sunrise but also so that you are not walking up in the heat of the day. Double check what time sunrise is expected – you will want to start around 3 hours before sunrise so probably around 4am.
Bring a torch if you have one or use your phone’s torchlight. There will likely be plenty of other people and lights starting the trail at this time too. Wear layers too, it will be cold in the middle of the night and it can be windy and chilly at the peak. When you started walking back down once the sun is up, you’ll probably get a little warm.
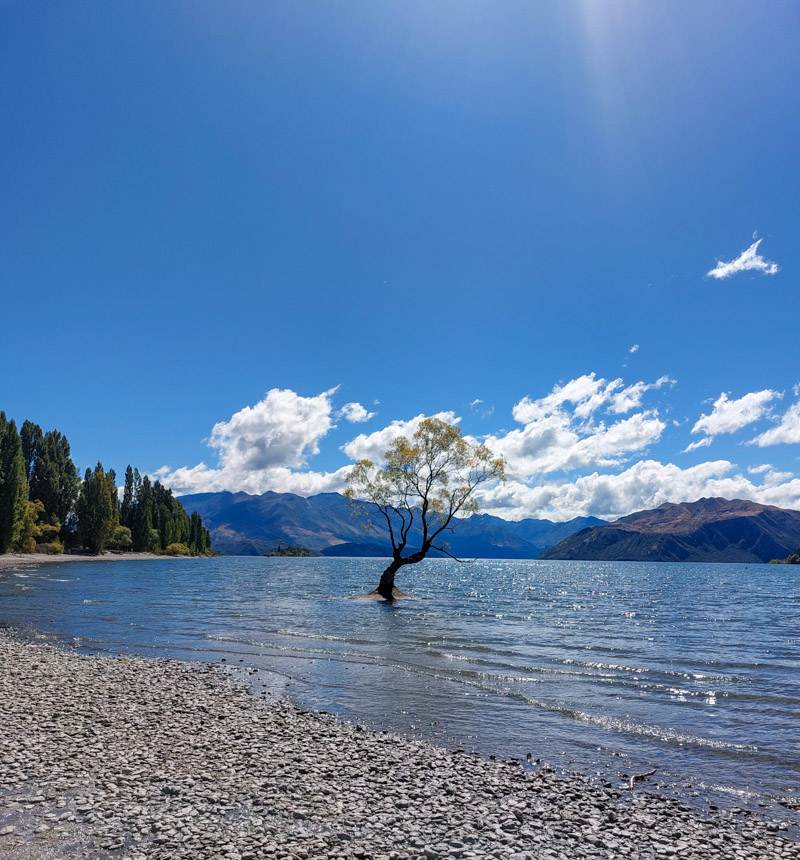
After the hike, drive into Wanaka to explore the town. If you’re a little sweaty and need a shower first, head to Wanaka Recreation Centre. Grab lunch at one of the many food vans along Brownston Street, between Helwick and Chelmers Streets.
Go for a stroll along the lake shore to see #thatwanakatree – a lone tree growing in the lake, or simply park up lakeside and relax for the rest of the afternoon!
In the evening, either drive to Queenstown and camp nearby or camp near Wanaka (more free options!) and head to Queenstown in the morning.
Campsites: Red Bridge Reserve (free, SC only), Camp Lake Hawea ($15pp)
Driving: 1 hour, 69km if driving to Queenstown this day.
Activity Costs: $0
Day 15: Queenstown
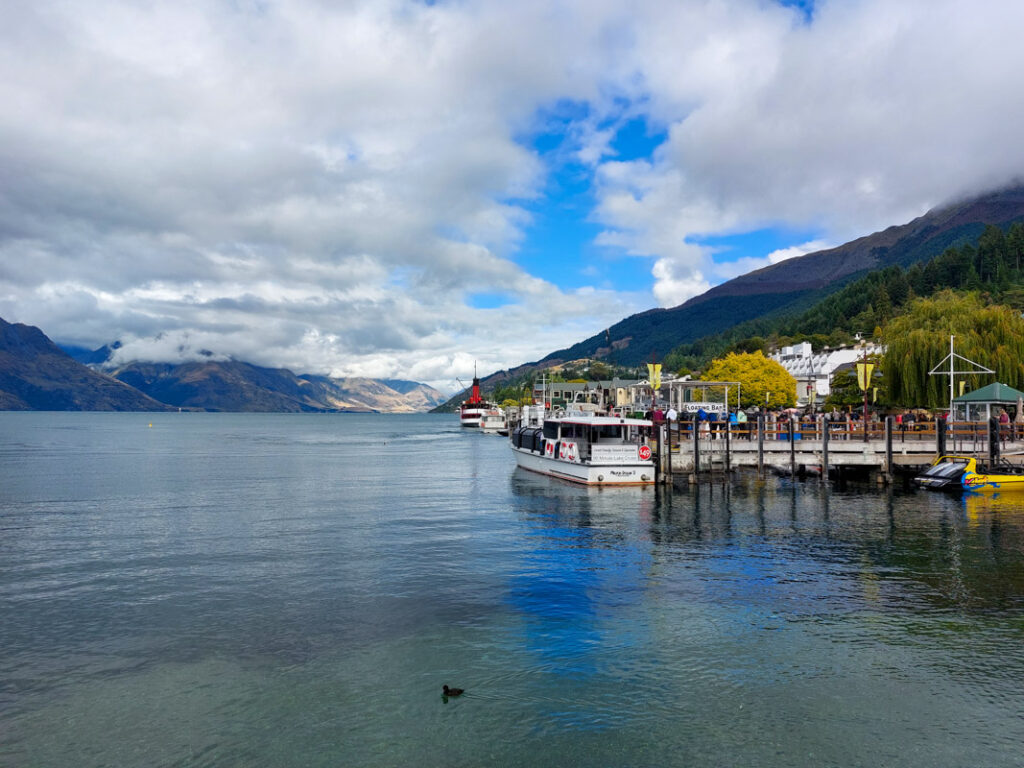
Queenstown is a lively city with plenty of summer and winter activities to offer. In the summer stroll around Queenstown Gardens and hike up to Queenstown Hill for great views over the lake. If you visit on a Saturday, don’t miss the market along the waterfront, you’ll find lots of interesting handcrafted items for sale.
Campsites: Driftaway Queenstown (from $24) or Twelve Mile Delta ($15pp)
Driving: 1 hour, 69km if driving from Wanaka this day.
Activity Costs: $0
Day 16: Milford Sound
Milford Sound is buried within Fiordland National Park. It is a stunning fiord surronded by mountains. Because of its unique landscape it isn’t the easiest place to get to. Whilst it doesn’t look too far on a map, it is around a 4 hour drive from Queenstown. That adds up to a lot of driving there and back so if you fancy a break from big drives – join a day trip tour from Queenstown. This is obviously a more expensive option but the tour will include the boat ride in Milford Sound as well as transport and often food. Click here to browse tour prices and availability.
If you are determined to drive yourself, you could break up the journey by setting off the night before and camping along the way. Similarly you could do part of the journey back then find a campsite and continue in the morning.
Campsites: Driftaway Queenstown (from $24) or Twelve Mile Delta ($15pp)
Driving: 7.5 hours, 575km
Activity Costs: $130+
Day 17: Arrowtown & Twizel
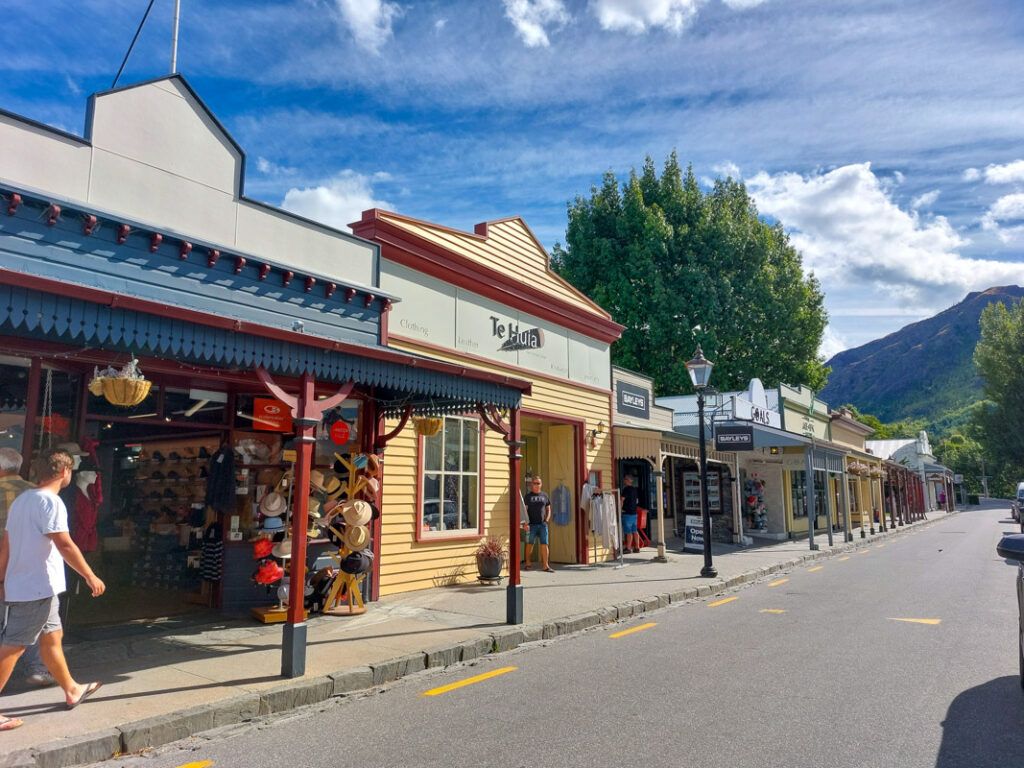
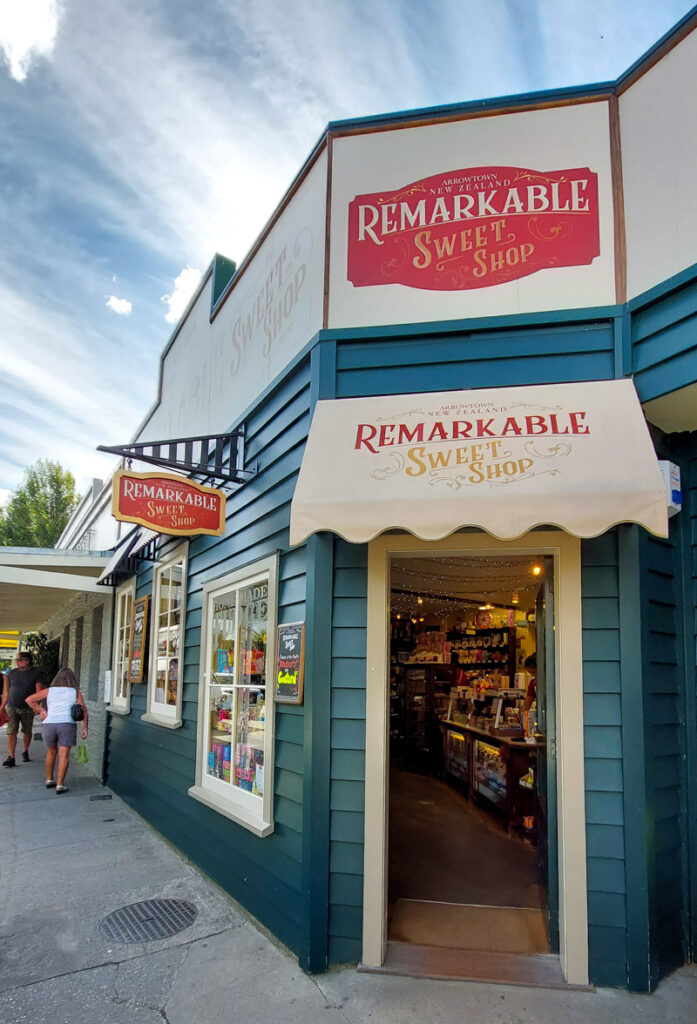
Arrowtown is a small gold-rush town, just outside Queenstown. The main street running through town is very picturesque and almost has a wildwest feel to it. There are lots of boutique stores, cafes and an old-timey sweet shop. There is a small museum in town where you can hire gold panning equipment but I highly doubt you will find much as the town’s gold rush days are long gone!
During it’s heyday Arrowtown had a large Chinese population as people immigrated there in search for gold. You can still explore the remains of the Chinese settlement in the town and learn about their history and contribution to the gold rush.
After you have explore Arrowtown, drive up to Twizel to spend the night. There isn’t much to do in Twizel but the area is well known for stargazing. If you are lucky to have a clear night, make sure you look up to the skies!
Campsites: Lake Pukaki Reserve (free, SC only) or Twizel Holiday Park (from $44)
Driving: 2.5 hours, 206km
Activity Costs: $0
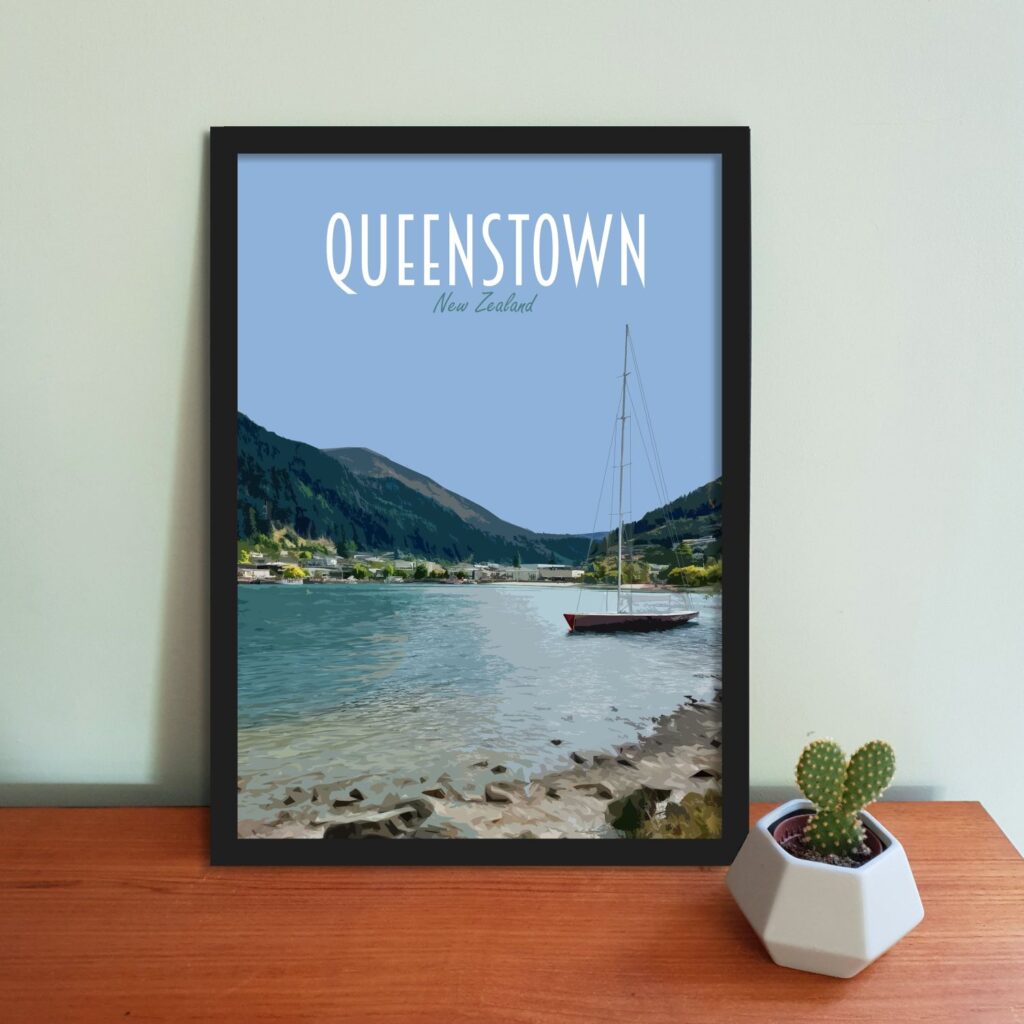
South Island Travel Posters
Day 18: Mount Cook and Lake Tekapo
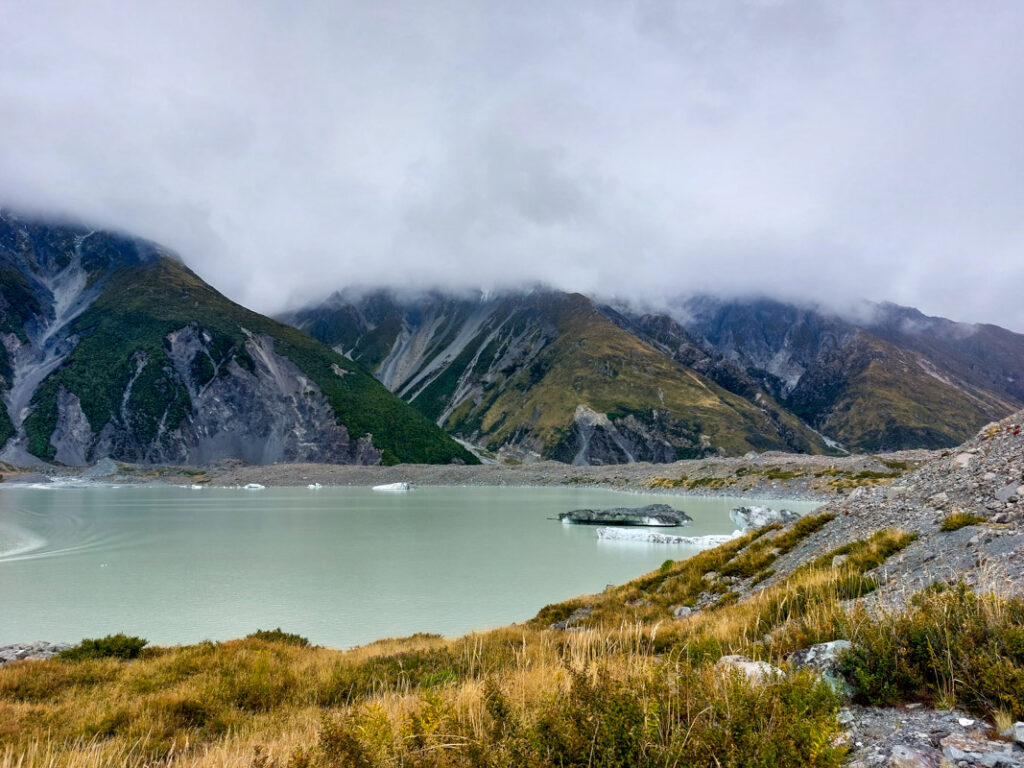
If you’re lucky to visit Mount Cook on a clear day, expect to see some amazing views of the mountain and glacier. There are several walks you can do around the park – start off at the visitor centre to learn more. There is also a shelter near the visitor centre with free cold showers that may be useful if your camper or campsite doesn’t have any!
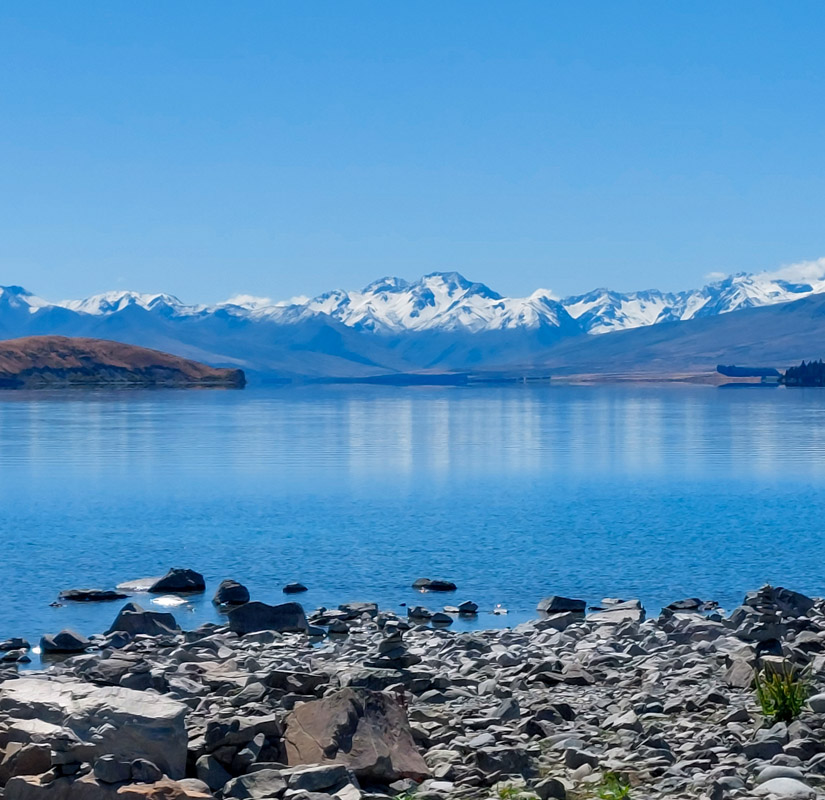
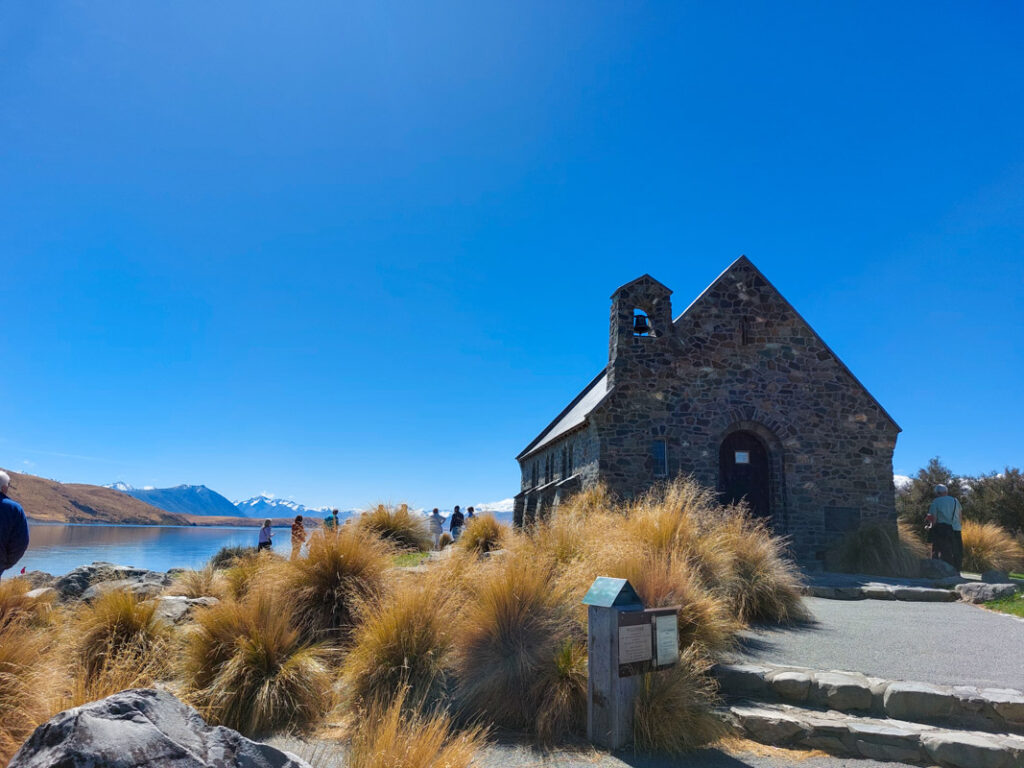
After you have explore the Mount Cook area, drive around the Lake Tekapo. This was one of my favourite spots in New Zealand. Along the lake there is a tiny stone church with the most wonderful view! There is also a nice hike along Mount John Walkway, although you might want to save this for the morning if you did a lot of walking by Mt. Cook.
Campsites: Lake McGregor Campsite ($10pp)
Driving: 2 hours, 170km
Activity Costs: $0
Day 19: Arthur’s Pass
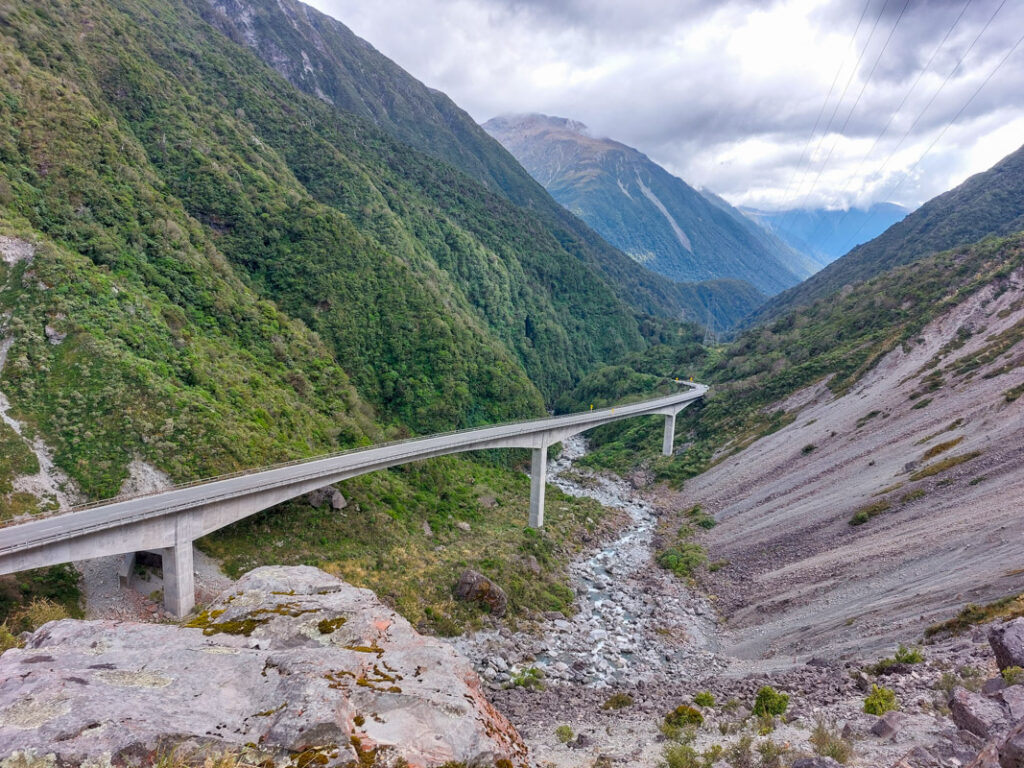
Arthur’s Pass is a National Park with plenty of trails to explore. Start in the visitor centre in the tiny Arthur’s Pass Village. There is a long 7-8 hour trail that you can do if you have the time. If you want shorter walks, try the Devil’s Punchbowl Waterfall walk.
On the way to or out of Arthur’s Pass to Christchurch, stop off at Castle Hill for another short walk. On top of the hill there is a collection of large stones, almost like a natural Stonehenge.
Campsites: Arthur’s Shelter Campsite (free)
Driving: 4 hours, 308km
Activity Costs: $0
Day 20: Christchurch
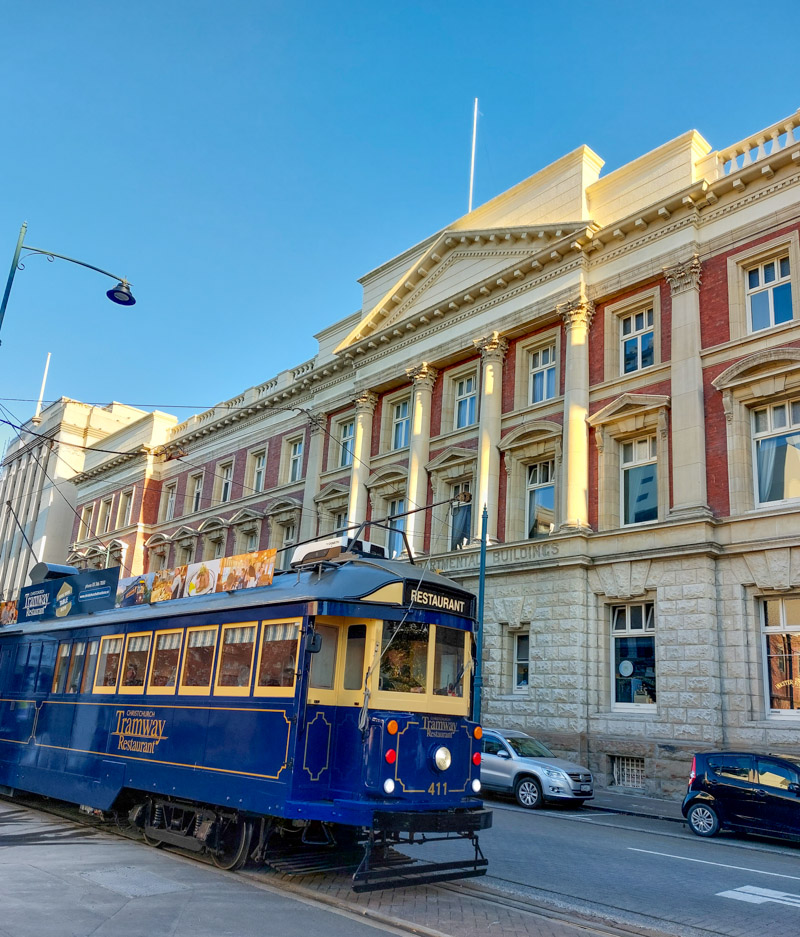
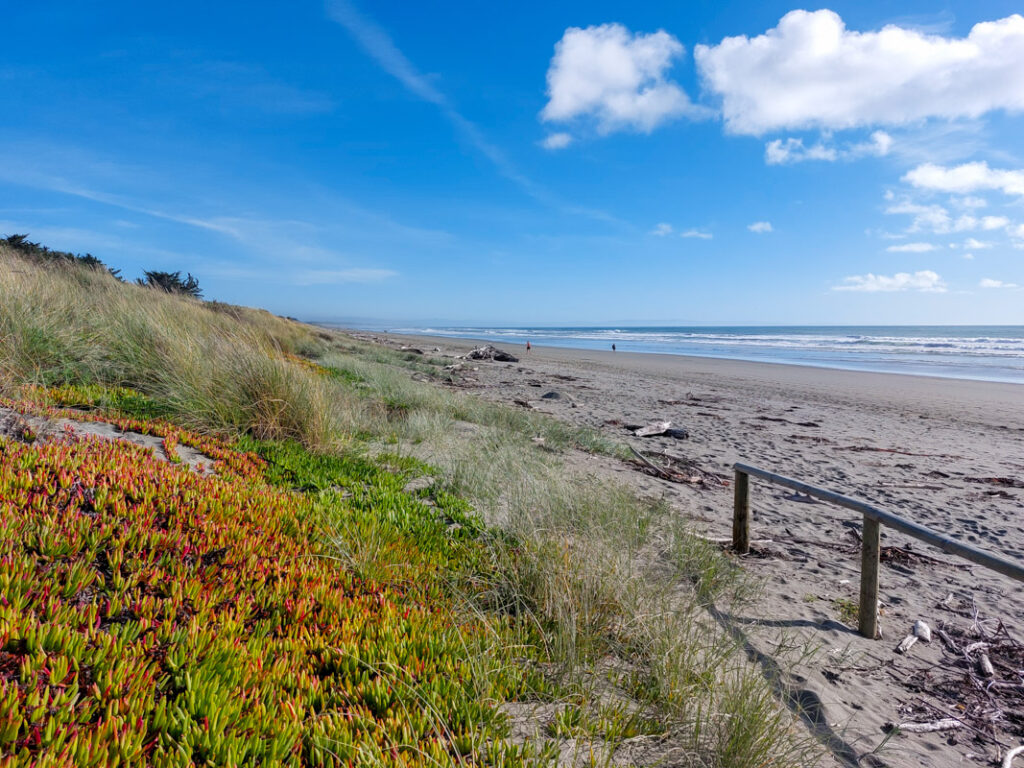
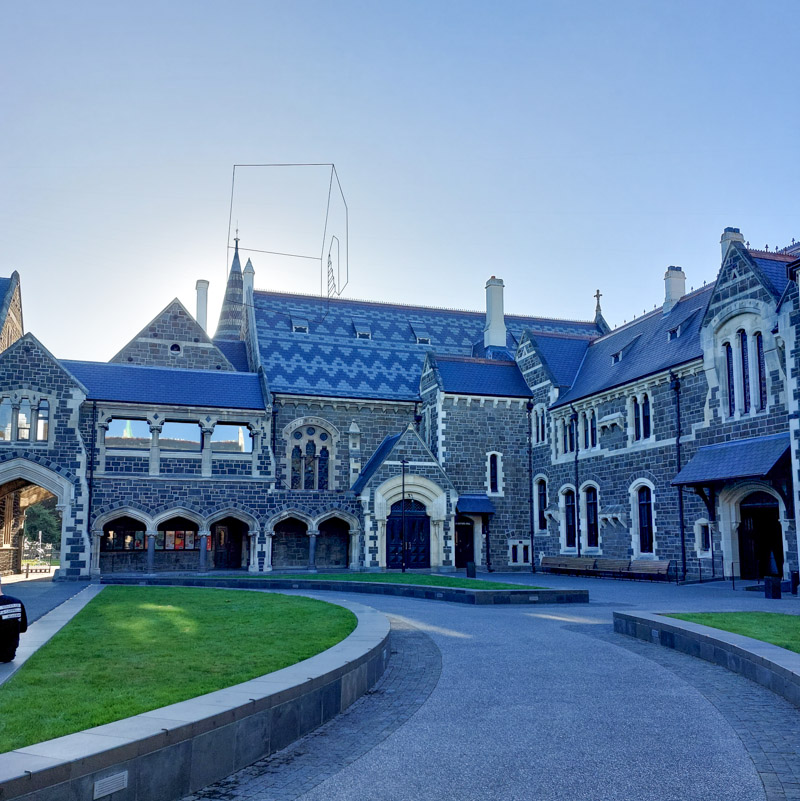
There is plenty to do in Christchurch to fill a day. If you want to explore museums, visit Quake City or the Canterbury Museum. For outdoor activities, stroll around the botanical gardens, explore the architecture of the old university buildings around Rolleston Avenue or head to one of the beaches.
If you want to eat out, try Riverside Market or one of the many eateries on the colourful New Regent Street. Whilst there, look out for the antique Christchurch tram!
Campsites: North Beach Car Park (free, SC only) or South Brighton Holiday Park.
Driving: 2 hours, 150km
Activity Costs: variable
Day 21: Head home
On your last day in New Zealand, it’s time to pack up your campervan and head to the airport. If you’re travelling for some time, rather than heading straight home, I’d recommend visiting Fiji next! We spent 5 days on a beach in Fiji after our three weeks in a campervan and it was wonderful! The flight to Fiji is only around 4 hours from New Zealand so it’s worth visiting whilst you’re in that part of the world!
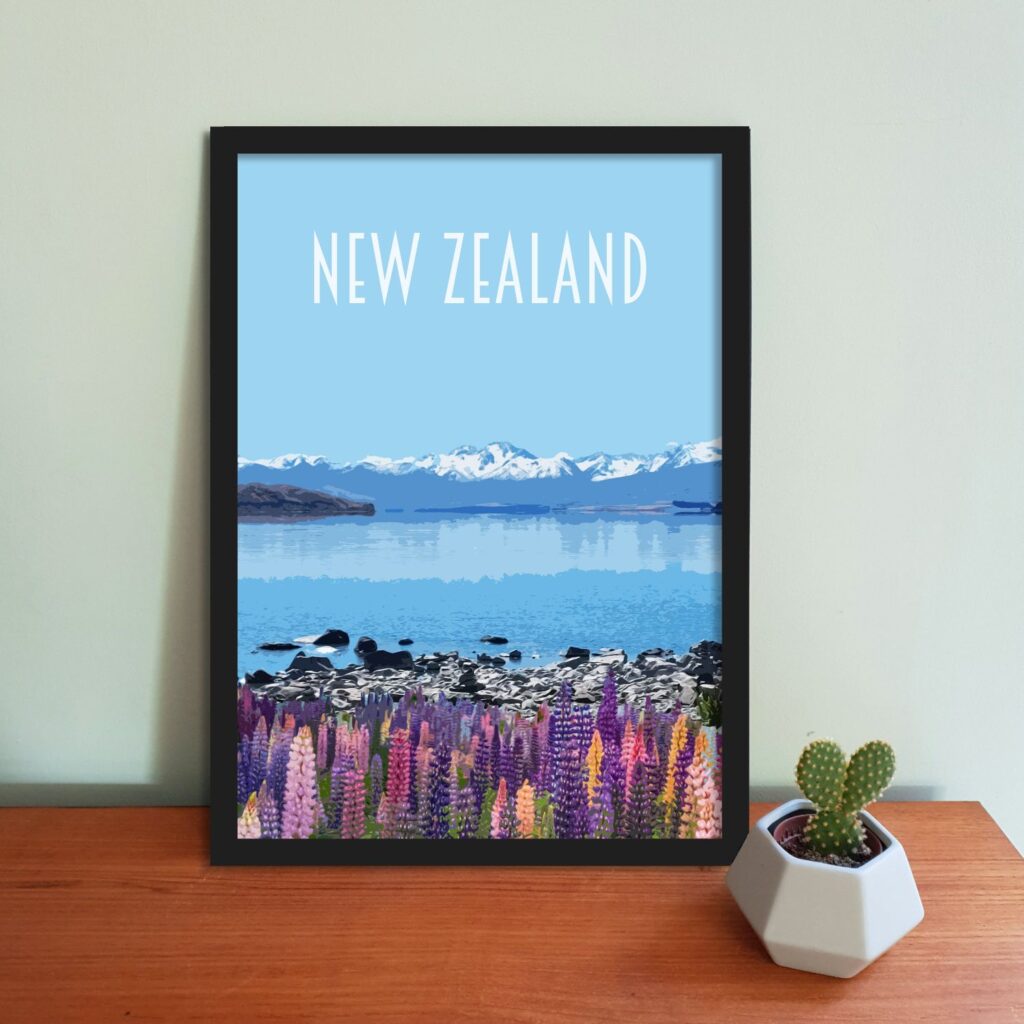
New Zealand Travel Posters
More New Zealand Travel Tips
Do you need a visa to visit New Zealand?
Passport holders from a lot of countries including the UK, USA, Canada and many European countries do not require a visa to visit New Zealand. However, they do need a NZeTA. This only takes 72 hours to receive and can be requested via an app. The NZeTA itself only costs $17 NZD but alongside this you will also have to pay an additional $35 for the IVL (international visitor conservation and tourist levy). You can think of this as helping to preserve all the national parks that you will inevitably visit for free.
Click here to check if your country is on the visa exemption list
Click here for more information on the NZeTA
When is the best time to visit New Zealand?
This road trip itinerary is designed to be taken during New Zealand’s summertime which lasts from December to January. The weather in the summer in New Zealand can still be variable so expect some rain and even cold spells. The temperature is usually around 20-25˚C (68-77˚F).
Where to hire a campervan in New Zealand?
Driving a campervan is a popular option for travellers and locals in New Zealand. There are several companies that offer campervans in various sizes, with different facilities. Most have depots in Auckland, Christchurch and Queenstown so it is easy enough to find a company that will allow you to collect in Auckland and return to Christchurch. It is common to be charged an additional one-way fee for this. Click here to read more tips on hiring a campervan in New Zealand and see a comparison of costs.
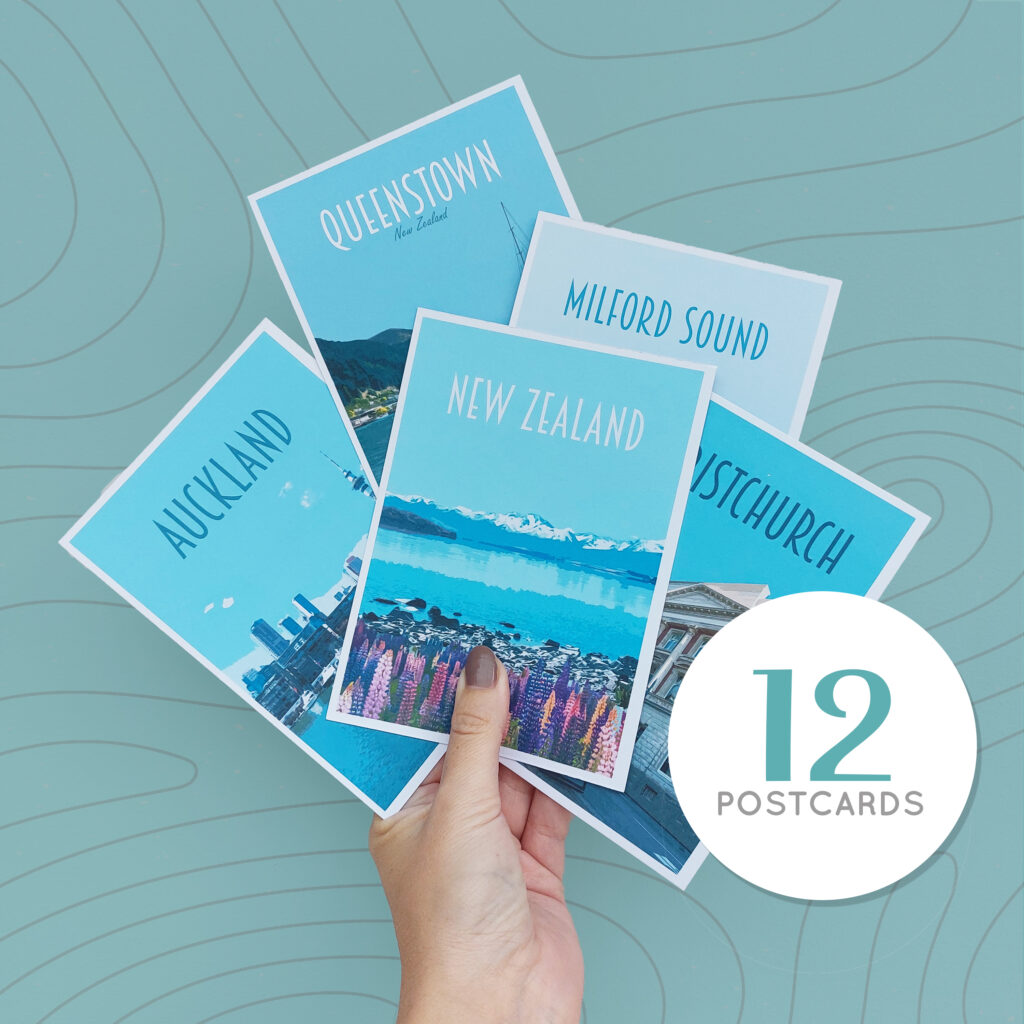
Where to Next?
This itinerary is amazing! I’ve been dreaming of a road trip in New Zealand, and your detailed route really helps with planning. The tips on hidden gems to visit are especially appreciated. Can’t wait to hit the road and explore!
What an incredible itinerary! You’ve covered so many amazing spots in New Zealand. I can’t wait to explore all these beautiful places on my own road trip. Thanks for the detailed tips and recommendations!
Loved this itinerary! It’s super helpful for planning my upcoming trip to New Zealand. The mix of nature and culture sounds perfect. Can’t wait to visit those stunning spots you recommended!
This itinerary is absolutely amazing! I love how you’ve included both popular spots and hidden gems. The tips on where to stay and what to eat are super helpful. I can’t wait to plan my own road trip in New Zealand! Thank you for sharing your adventures!
This itinerary looks amazing! I love how you’ve covered both the stunning landscapes and unique activities in New Zealand. I can’t wait to try the suggested hiking trails and explore the local culture. Thanks for sharing your experiences!
This itinerary looks amazing! I love the variety of places you included, from stunning landscapes to vibrant cities. I can’t wait to start planning my own road trip in New Zealand using your recommendations. Thanks for sharing your adventure!
This itinerary looks amazing! I love how you’ve included both popular sights and hidden gems. I can’t wait to use your tips for my upcoming trip to New Zealand. Thanks for sharing your experiences!
This itinerary looks incredible! I love how you’ve included both popular spots and hidden gems. I can’t wait to follow your route and explore the beautiful landscapes of New Zealand! Thank you for sharing such detailed information!
What an amazing itinerary! I’m so inspired by your detailed journey through New Zealand. The tips about hidden gems and scenic spots were especially helpful. Can’t wait to start planning my own trip!
What an incredible itinerary! I love how you’ve covered such diverse landscapes and experiences throughout New Zealand. The tips on where to stop and what to see are super helpful. I can’t wait to start planning my own road trip based on your suggestions!
This itinerary is fantastic! I love how you’ve included a mix of breathtaking landscapes and cultural experiences. I can’t wait to try some of these hikes and explore the local food scene. Thanks for the detailed tips!
This itinerary looks fantastic! I’m planning my own Australia and New Zealand trip and the detailed day-by-day breakdown is super helpful. I can’t wait to explore all the stunning landscapes you highlighted. Any tips for traveling with kids? Thanks for sharing your adventure!
What an amazing itinerary! I love how you’ve included a mix of scenic spots and local experiences. The tips about the hidden gems really stood out to me. I can’t wait to try some of these routes on my own trip to New Zealand! Thanks for sharing!